.png)
.png) 1 month ago
18
1 month ago
18
From the very moment Mina steps onto the streets of Ossex, Mina the Hollower makes one thing quite clear: it is a game designed to be a grueling test of reflexes and patience.
With that in mind, Yacht Club Games has crafted a gorgeously dark world that wears its retro inspirations on its sleeve, drawing mechanical influence from the unforgiving top-down exploration of old-school action adventures while blending it with a Souls-like risk-and-reward system.
 Related
Mina the Hollower: All Kear Locations
A complete guide to find all 50 Kears.
So yes, this means that we have to face some quite challenging bosses around here and survive to tell the tale afterward! These confrontations are easily one of the title’s greatest strengths, since every single one of them features a unique design and storytelling, often connected to the specific region where you find them. Because of that, we decided to pay tribute to the creatures that make our journey through Ossex a lot more spicy – and here are the 10 hardest bosses in Mina the Hollower.
10 Midden
An Early-Game Reality Check
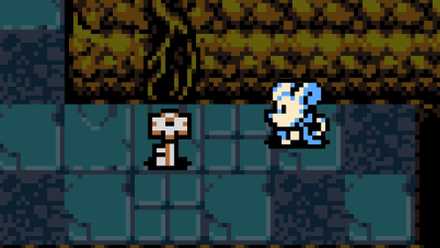
Midden is probably the weirdest boss on this list because, instead of having an imposing design that immediately tells you he’s going to give you a hard time, he is a tiny, shriveled, and smelly creature – quite literally.
This is because you encounter him multiple times deep within the trenches of the Queensbury Crypt, right where the sewers overflow, until he eventually loses his patience and attacks you, accusing you of being the one who stinks (rather than admitting it is him!). This dramatic encounter triggers an optional boss fight that forces you to face him with two fewer Plasma Vials than usual, as his arena is sealed behind a barrier that demands you sacrifice those two heals just to enter.
If that wasn't bad enough, Midden can be an incredibly annoying foe because he continuously summons swarms of small, protective flies that circle his physical form and deal contact damage if you get too reckless. Also, the moment his HP drops to its 50% threshold, he enters a rage state where his movement speeds up dramatically, and his surrounding flies mutate into explosive hazards.
So your best bet for surviving this chaotic phase is to maintain your composure and avoid rushing blindly into his hitbox. Just focus entirely on destroying the flies first, and only strike Midden once his defensive perimeter is completely cleared. Oh, and what makes this fight so tricky (aside from his actual attack patterns) is that you will likely stumble into his lair quite early, meaning Midden serves as a wake-up call regarding the game’s actual difficulty.
9 Furgus the Faithful
A Four-Headed Challenge
If surviving a standard boss encounter with a single head is difficult enough in Ossex, trying to manage a grotesque creature sporting four independent heads is a true exercise in psychological endurance.
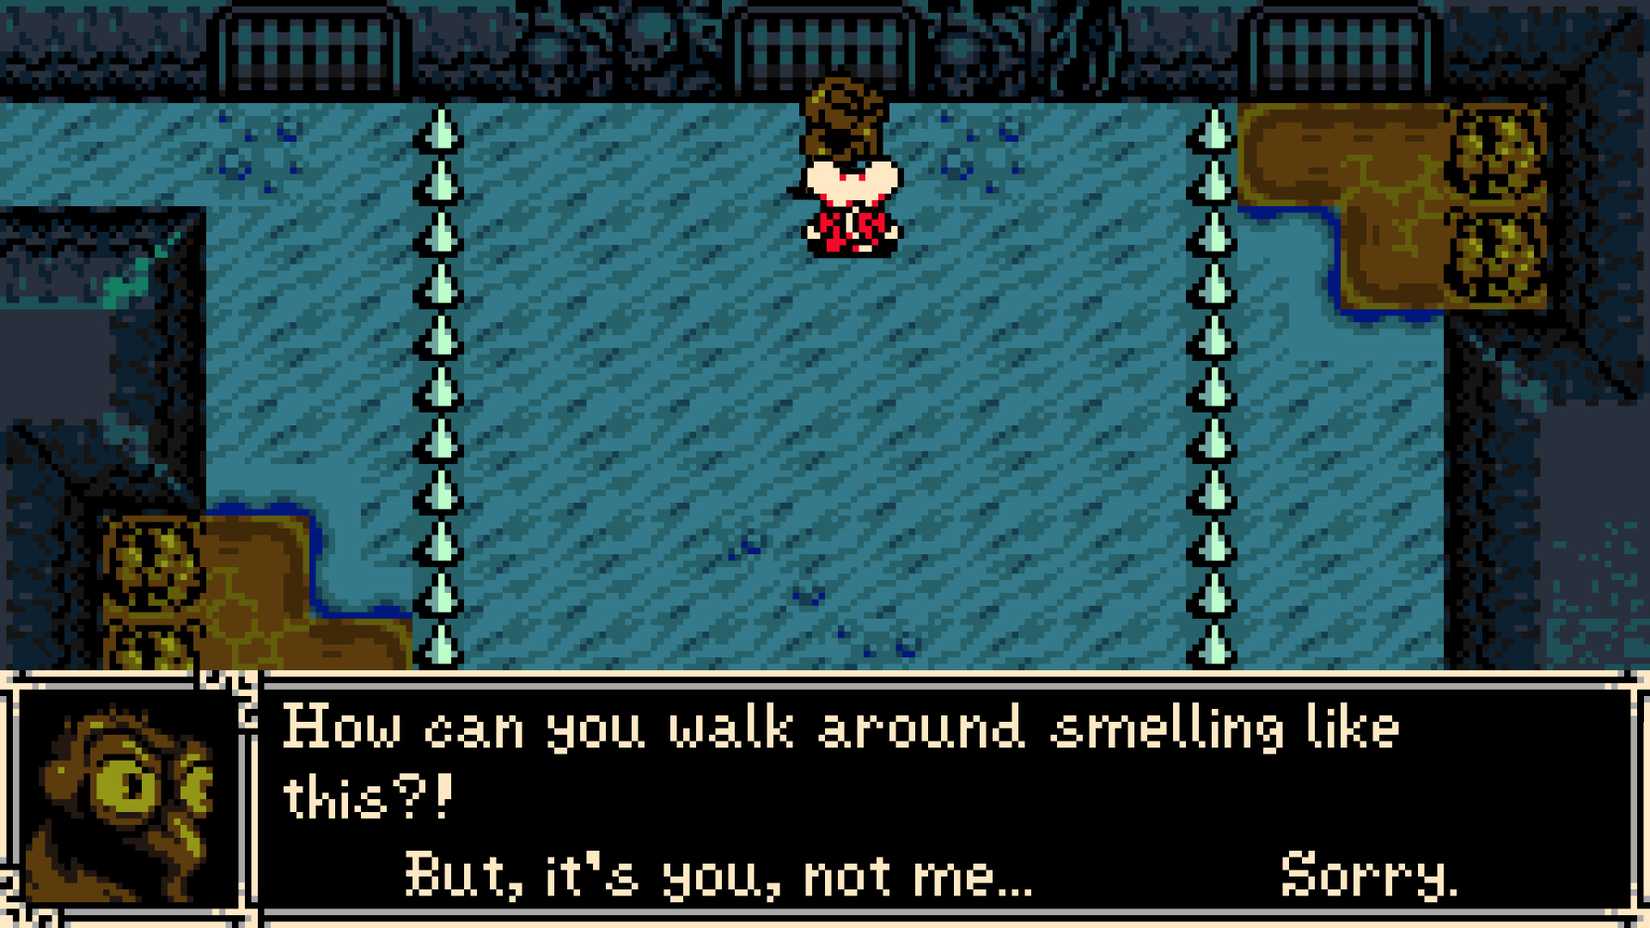
Furgus the Faithful is like an even spicier version of the famous mythological creature Cerberus, where each of his independent heads continuously tracks Mina's positioning, launching multiple fire projectiles at her and immediately protecting itself afterward, blocking incoming damage on that specific head.
To make matters worse, Furgus isn't content with just filling the screen with hazards, as he can stretch his elongated necks across distances to execute sudden, snapping bite attacks. He also possesses a close-range claw swipe to punish players who attempt to camp underneath his hitbox.
To conquer this multi-headed monstrosity, you must abandon greedy offense and treat the fight like a dance, weaving carefully between the gaps of his projectile streams and utilizing your burrowing ability to slide underneath his neck lunges, striking his central mass only when all four heads are recovering from their casting animations.
8 Locomotress Agnes
Phantom of the Locomotive
The lore surrounding the frozen heights of Coltrane Peak paints a tragic picture, as you will continuously encounter the sorrowful spirits of train passengers who perished in a catastrophic derailment long ago. Every phantom you speak with points a ghostly finger at the train's conductor, Agnes, claiming she became violently possessed in the moments leading up to the crash.
When you finally reach the end of the region, you discover that Agnes has really mutated into a malevolent phantom tied to the wreck, and she is waiting to challenge you right on top of a roaring locomotive. That storytelling alone is powerful enough to give her a spot on this list, but trying to fight a boss on top of a high-speed train is quite challenging!
This is because you are fighting directly against her, but also managing the objects she manipulates and throws at you, which means you need to stay alert to both threats at all times. My recommendation is to equip a reliable long-range weapon or subweapon, plant your feet firmly on the train roof, and aim your strikes straight upward toward her floating position to chip away at her HP bar.
However, the true nightmare begins during her chaotic second phase, where you must prioritize pure damage to end the fight as quickly as possible: Agnes literally fuses her soul with the locomotive, and you must strike her glowing eye windows to inflict damage while avoiding her attack hitboxes, which become absolutely huge. So your best bet is to sprint like a lunatic toward the opposite side of the screen to avoid being hit by her, while striking her eyes whenever you can.
 Related
Mina the Hollower: 10 Best Modifiers to Make the Game Easier
If you're having some trouble getting into Mina's adventure, you can make things a little easier.
7 Nox’s Beast
Gotta Hate an Aquatic Boss
Aquatic boss fights are traditionally terrifying in any game, and Mina the Hollower executes this trope beautifully with the horrifying Nox’s Beast. Waiting at the end of the murky Nox’s Bayou, this mandatory boss takes the form of a gargantuan alligator capable of transmuting its physical shape into an even bigger monstrosity.
He features a quite diverse attack pattern, making it very hard to determine his next move until the very last second. He will violently bounce across the floor in an attempt to crush you, and he will constantly open his jaws to suck you into his maw. Oh, and he will also dive beneath the swamp water, emerging in a series of rapid, snapping lunges, or even violently resurface to permanently submerge the solid floor panels, transforming the arena into deep water that causes instant damage if you fall in.
To maintain a fighting chance, you must keep a safe distance at all times, relying heavily on the burrowing ability to circle around his perimeter to counterattack at the right time. You should also always burrow in the opposite direction when he opens his jaws. To complicate things further, the beast also spits out acidic bubbles that float across the screen, which you must manually strike and pop to keep the airwaves clear.
Thought it was over? His behavior changes completely once his HP drops below the 50% threshold, making him far more aggressive and hurling explosive bubbles instead of standard acid. Thank you, Mina the Hollower, for only intensifying my dread of aquatic bosses!
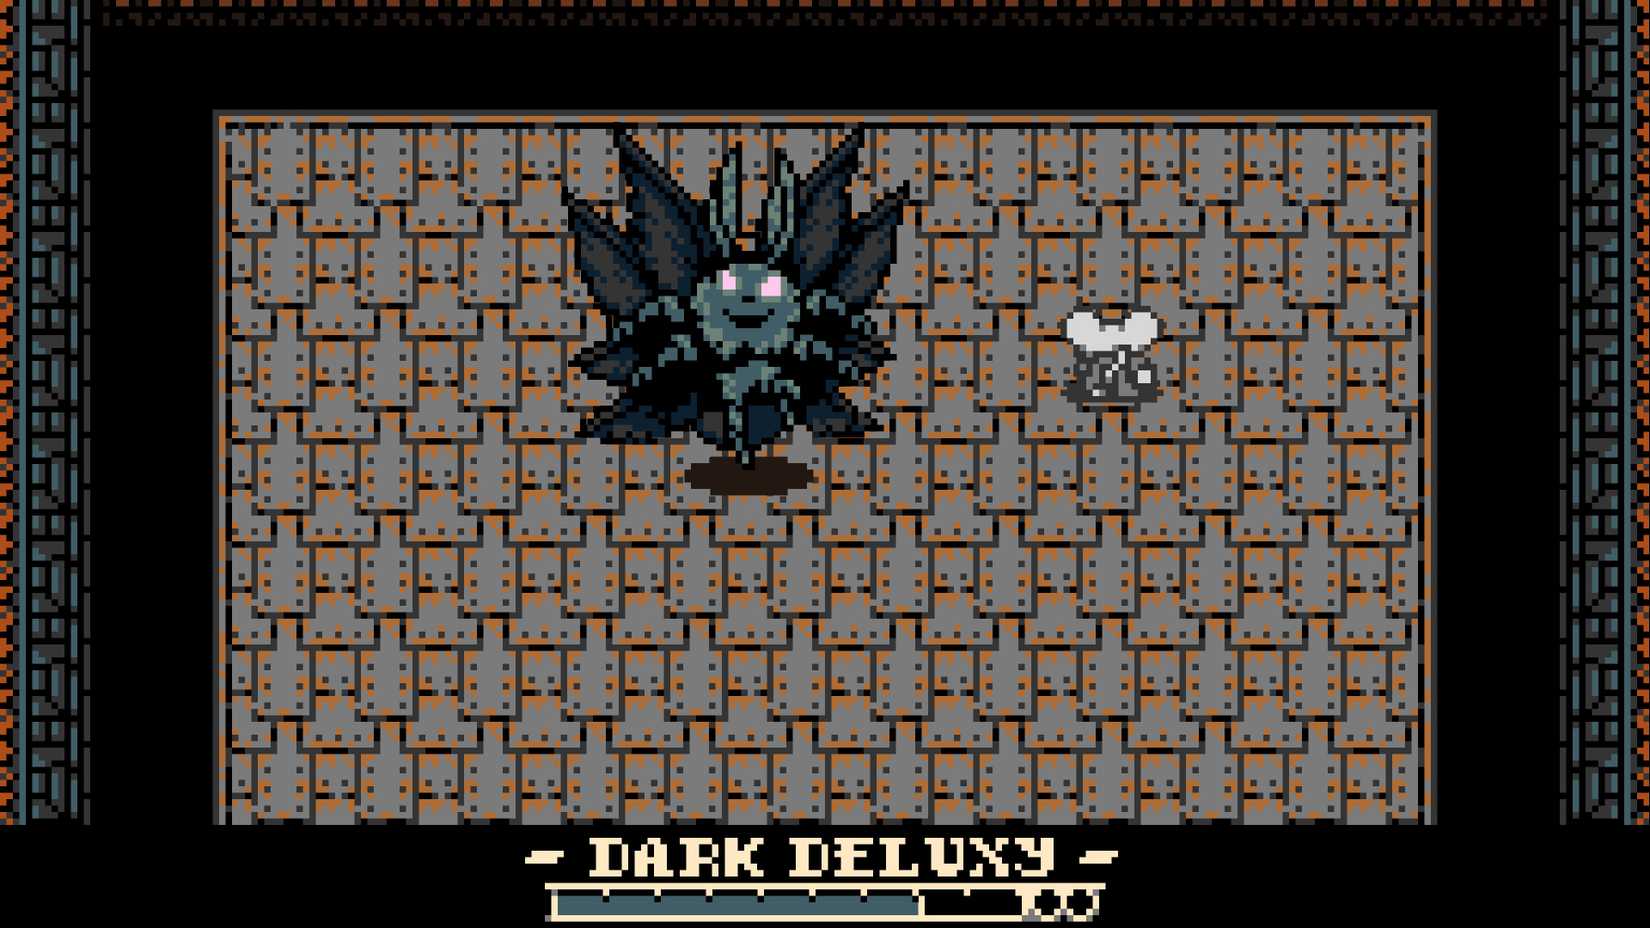
6 Dark Deluxy
Look For the Light
Reaching this unusual, optional boss fight requires you first to complete the main storyline of the Septemburg region. Once the threat is cleared, your objective is to reactivate the Windy Generator, which subsequently opens up a dark cavern directly in front of the machine.
Venture there to encounter an NPC named Deluxy, and agree to escort him out of the cave. This sequence functions as a dark platforming puzzle where the friendly creature acts as your sole source of light, illuminating the path ahead as you navigate to the exit. However, the moment you safely guide him to the cave exit, the intense energy of the generator violently infects his physical form, transmuting him into the terrifying Dark Deluxy!
That alone is already a good jumpscare, but what makes this encounter a true shock for the player is that the arena's layout permanently strips you of your ability to use the burrowing mechanic to evade damage. It is exactly at this moment that you realize you are completely addicted to burrowing, and its absence hits incredibly hard!
Dark Deluxy will continuously flood the narrow, pitch-black platforms with waves of purple energy puffs, forcing you to rely entirely on raw movement, perfect footwork, and precise manual spacing to survive. To overcome this claustrophobic battle, you must study the distinct trajectory of his projectile spreads, positioning Mina in the natural blind spots of his casting patterns and delivering swift strikes before he can relocate. A tough encounter!
5 The Carving Man
A Relentless Bogeyman
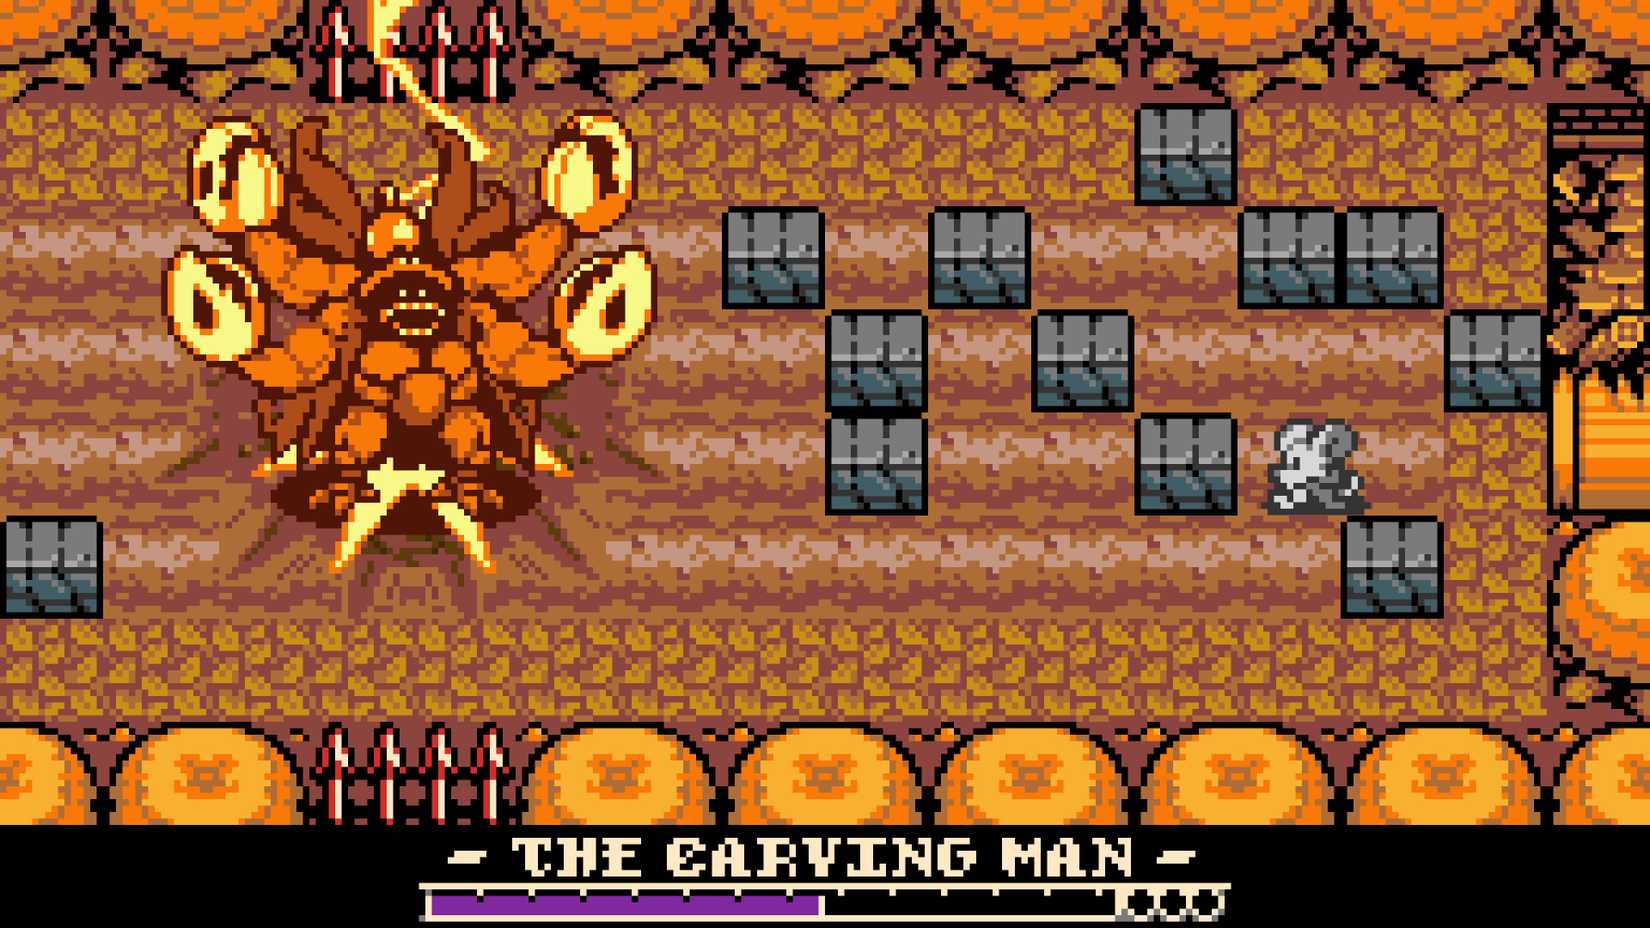
The Carving Man functions as Septemburg’s Mr.X from Resident Evil, since he is a terrifying bogeyman entity that relentlessly stalks and ambushes Mina throughout her entire exploration of the region.
When he finally corners you at the end of it, he sheds all subtlety, transforming into a colossal, four-armed behemoth that dominates the visual space of the arena. He begins to use his frame to execute sudden, high-velocity charging lunges across the stage, combining his physical attacks with devastating electrical fields that can rapidly lock down large sections of the floor.
Compounding the difficulty of his high-voltage offense is the layout of the arena itself, which is littered with solid wooden crates meant to actively disrupt your movement lines and trap you! To claim victory against this stalker, you must balance positioning with environmental awareness, attracting him to shatter the crates to keep your escape routes open. Also, watch his four massive arms closely, and in the moment they crackle with electrical current, prepare to use the burrowing ability to slide safely underneath his lunges, delivering counter-attacks to his back.
4 Thorne at Coltrane Peak
A Deadly Duel on Shinking Ground
While you will cross blades with the enigmatic Thorne multiple times throughout the game, his true mechanical spike occurs when you confront him within the freezing wilderness of Coltrane Peak.
During this chilling encounter, Thorne retains all of his high-velocity sword techniques (including the ability to summon multiple tornadoes, unleash rapid physical slashes, and trace volatile explosive trails) and also introduces a pair of new attacks that completely alter the flow of combat. For instance, he will constantly emit a sonar pulse across the arena, and if this wave touches Mina, Thorne enters an aggressive state, executing slashes at blinding speeds that are very hard to evade quickly.
To make an already stressful situation worse, Thorne will gradually destroy the outer boundaries of the arena as the battle progresses, slicing away the side platforms to shrink your available ground into a tiny, claustrophobic square.
Finally, Thorne spends most of the duel floating in the air, meaning standard ground attacks will whiff, forcing you to execute perfectly timed jumps just to land a hit. To counter his airborne agility, it is recommended to equip a long-range weapon like the Nightstar, the devastating crushing mace affixed to a flexible chain. Using this weapon allows you to maintain a safe, defensive distance from Thorne’s blinding sword combos while still possessing the vertical range needed to strike him out of the sky.
 Related
Mina the Hollower: 10 Best Modifiers to Make the Game Harder
Want to give your next playthrough some more zing? Leave it to the modifiers.
3 Baron Lionel & Radiant Lionel
A Divine Metamorphosis

If the final boss of the game weren’t on this list, something would be seriously wrong! The confrontation against Baron Lionel fully lives up to its status as the game's ultimate encounter, since this duel is basically split into two distinct phases, with the first being a tight, face-to-face duel between Lionel and Mina inside a limited arena.
He is exceptionally light on his feet, leaving a trail of volatile electrical tiles over every single floor panel he steps on, severely limiting your movement options. And he constantly uses an aggressive rotation of forward dashes and area-of-effect strikes, which you can easily distinguish by the colorful auras Lionel emits right before unleashing the blows. Also, you must watch his spacing carefully, as he possesses a lethal bite attack that drains Mina's health pool to heal his own HP, alongside a brutal grab that slams you against the walls, permanently shattering your orange health threshold.
After overcoming the first phase, you will trigger the second and final one, which is curiously a bit easier but incredibly grand, delivering a lovely JRPG climax. Lionel simply undergoes a massive metamorphosis into Radiant Lionel, a towering celestial entity. During this final stretch, you must sprint continuously along a generator track while his spectral claws swipe down from the heavens to crush you. This phase also delivers a fantastic lore revelation, as his claw shapes match the exact visual design of the game’s very first tutorial boss – proving that it was Lionel pulling the strings of the bosses as well.
To survive this divine confrontation, keep your eyes glued to the claw shadows manifesting on the track, using the burrowing ability to slide safely underneath his attacks and delivering precise strikes to his weak points whenever his arms become temporarily lodged in the machinery.
2 The Congealed
A Nightmare Born of Flesh

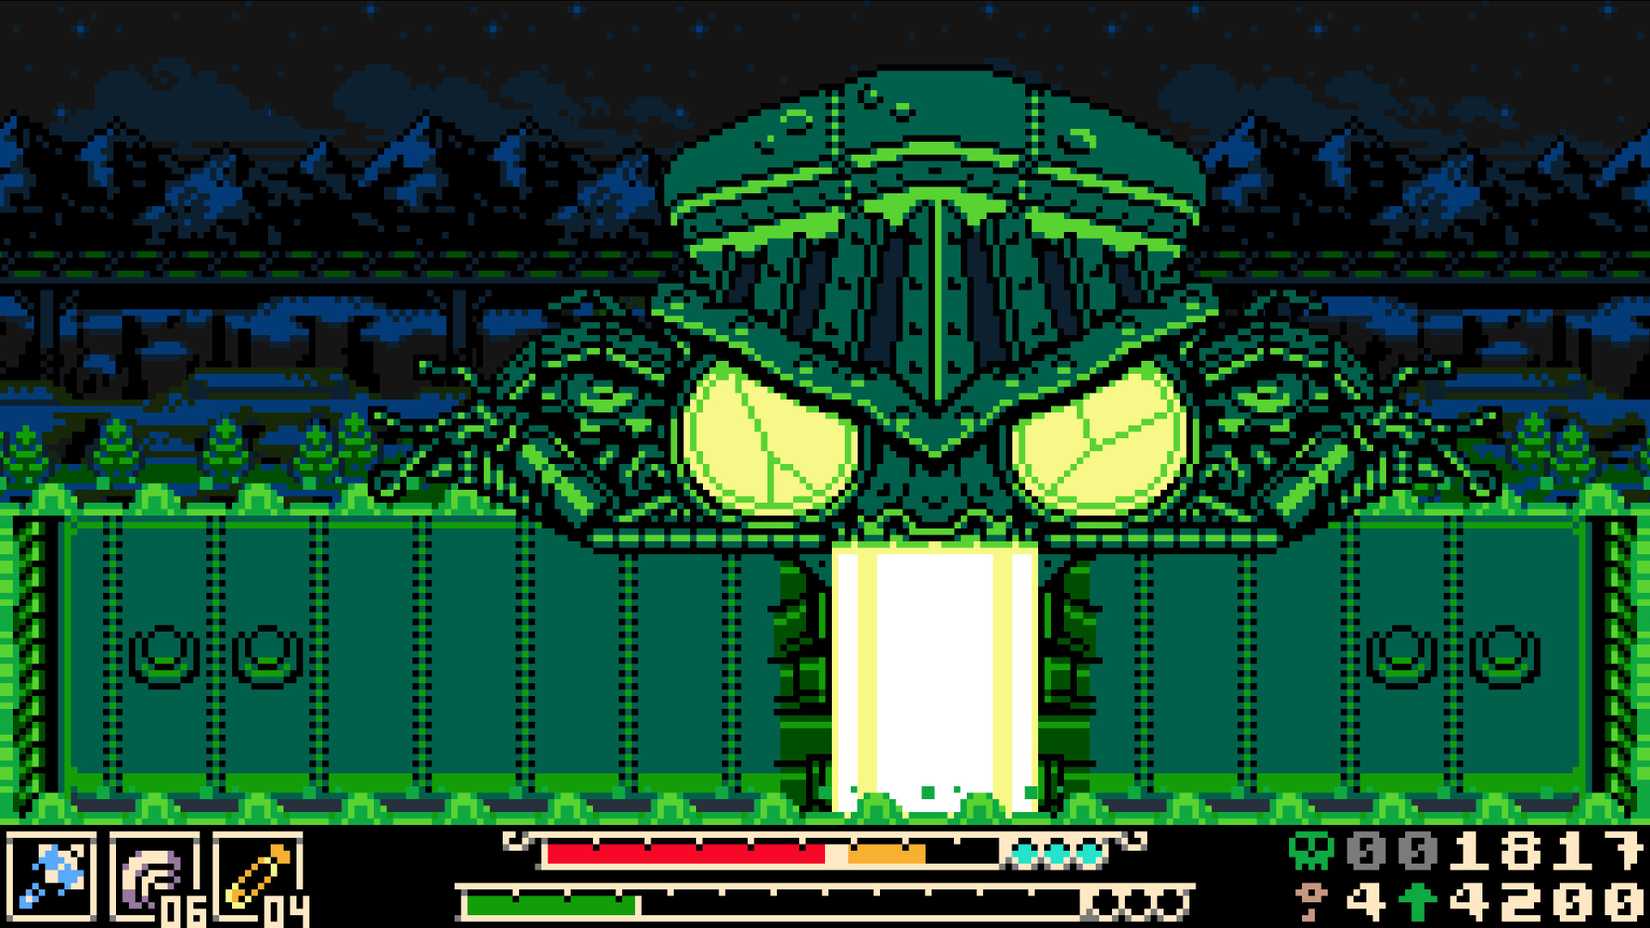
Looking as though it crawled straight out of the deepest pits of the underworld or from a lost Dark Souls region, The Congealed is a grotesque abomination made of shifting flesh and slime. His behavioral patterns match his horrific physical design, as he aggressively forces players into defensive panics by unleashing non-stop chains of physical sweeps and wide spreads of projectiles that force you to combine precise jumping with perfectly timed burrowing just to escape the crossfire.
To make an already overwhelming fight even more chaotic, the monster periodically summons waves of minor minions that flood the arena floor solely to disrupt your tracking and block your movement lines. However, the true nightmare of this encounter lies in its grueling endurance structure, as defeating his initial form triggers a second phase complete with a fully replenished, independent health bar. In this second form, his aggression skyrockets, and he gains the terrifying ability to violently split his form into a horde of demonic goblins, or even duplicate himself entirely!
Even after you conquer this nightmare, the fight forces you into a tense third phase against his floating, detached head. Fortunately, this final stretch is a bit easier, but it still requires you to navigate moving platforms to survive while delivering quick counter-attacks against the creature. Seriously, I still have nightmares about this one.
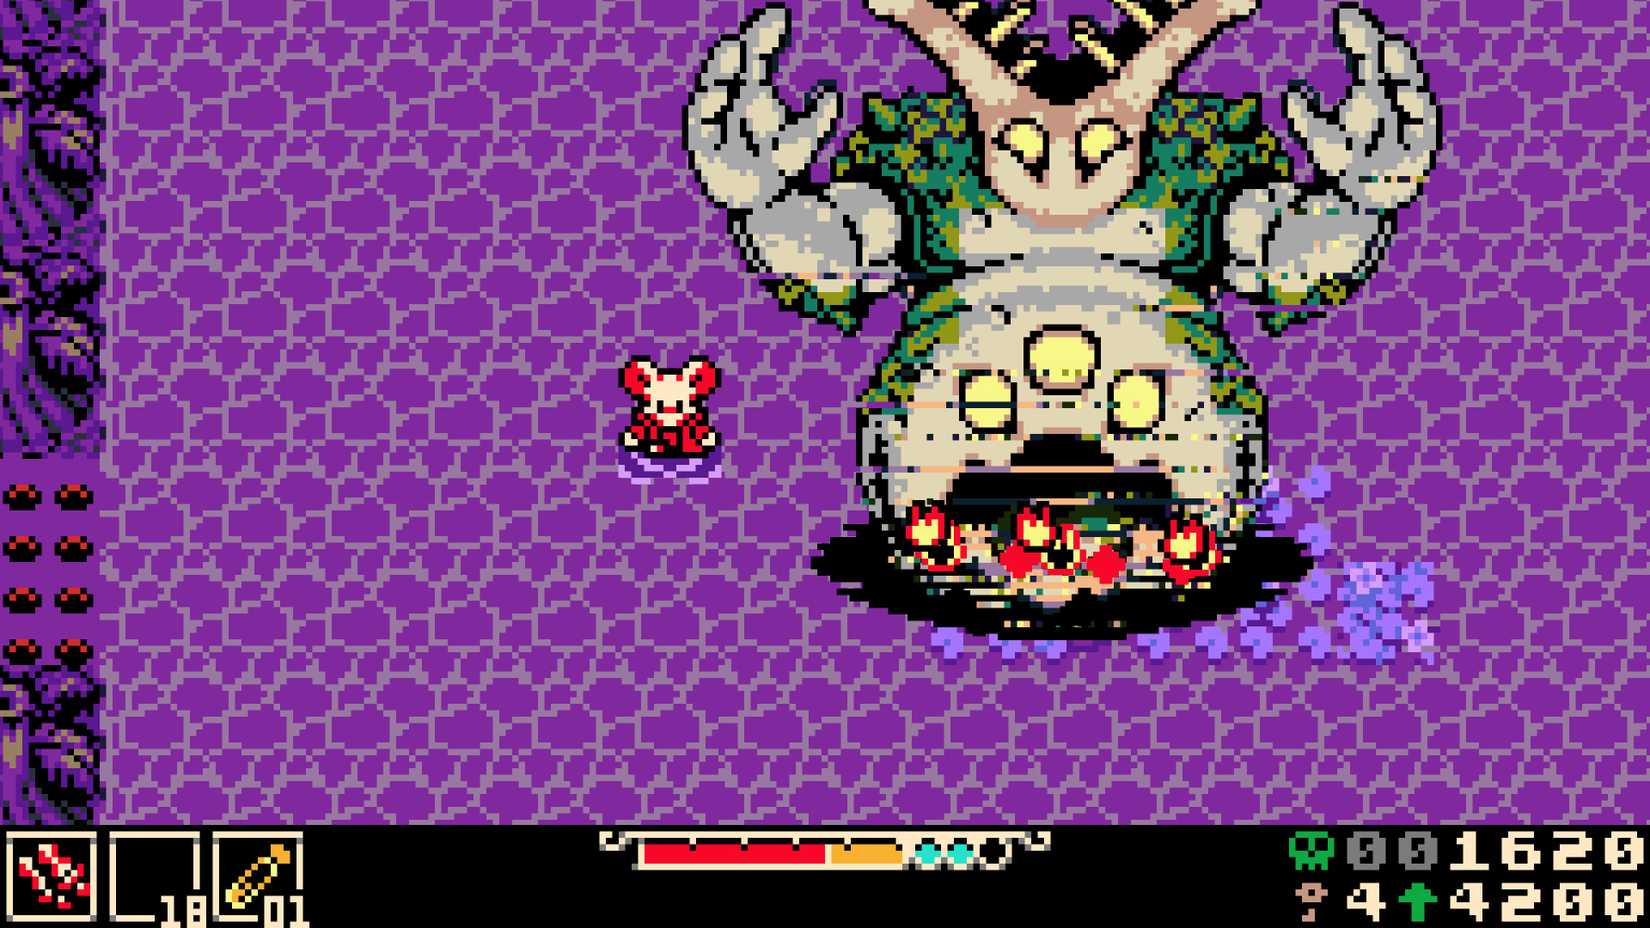
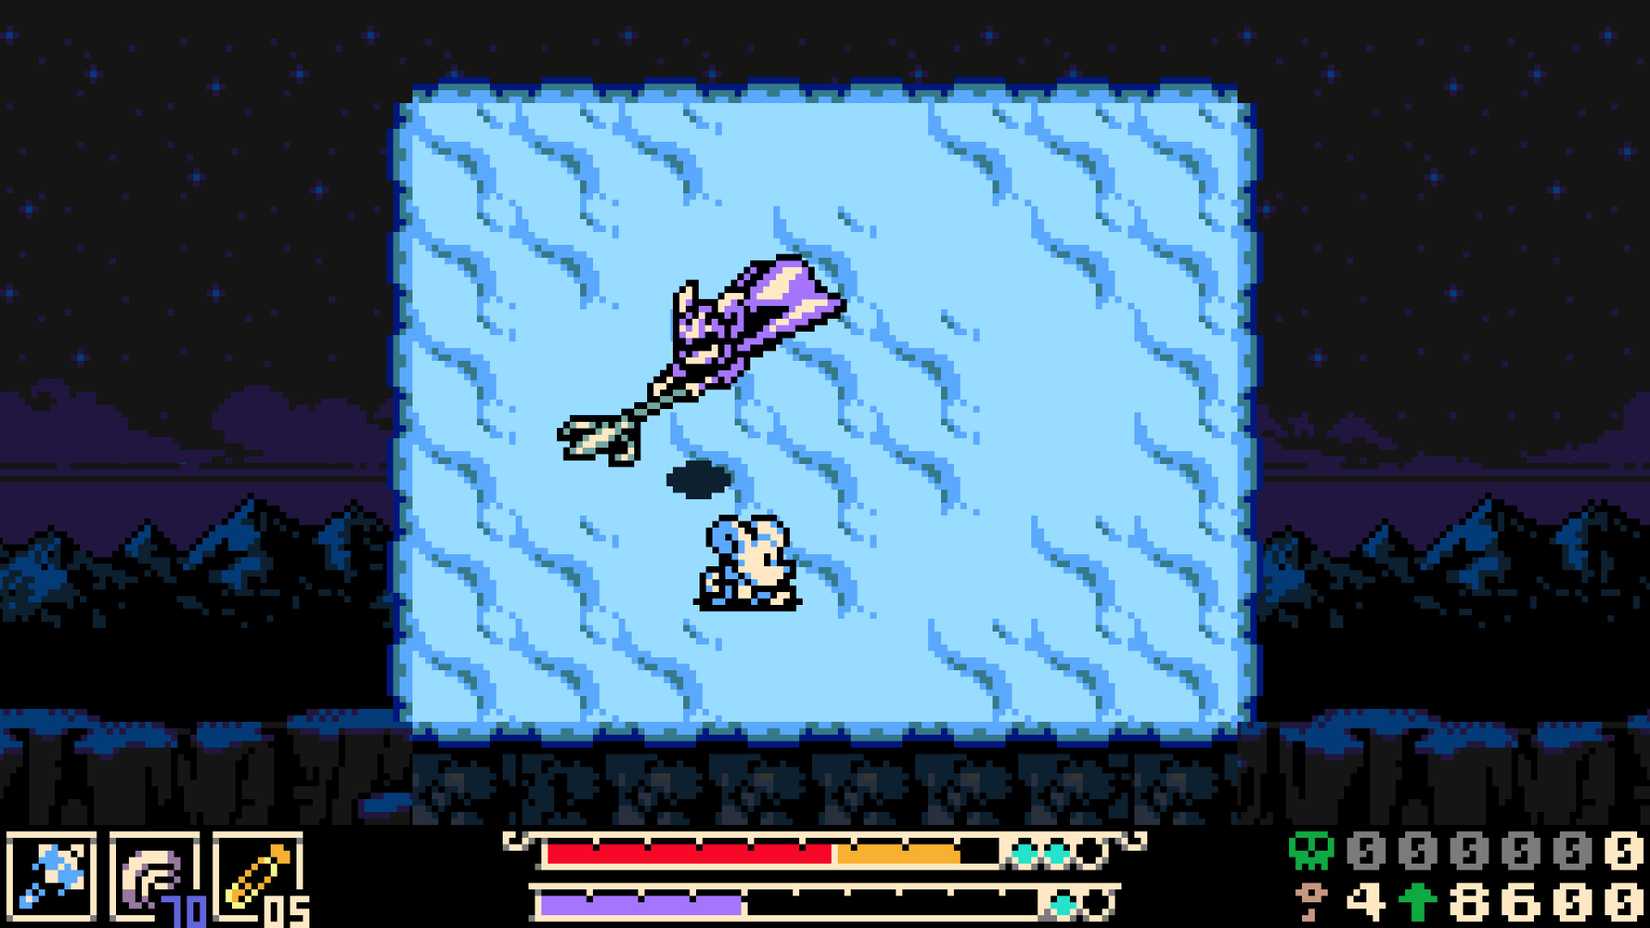
1 Mined Mind
The Bullet-Hell Mind Game

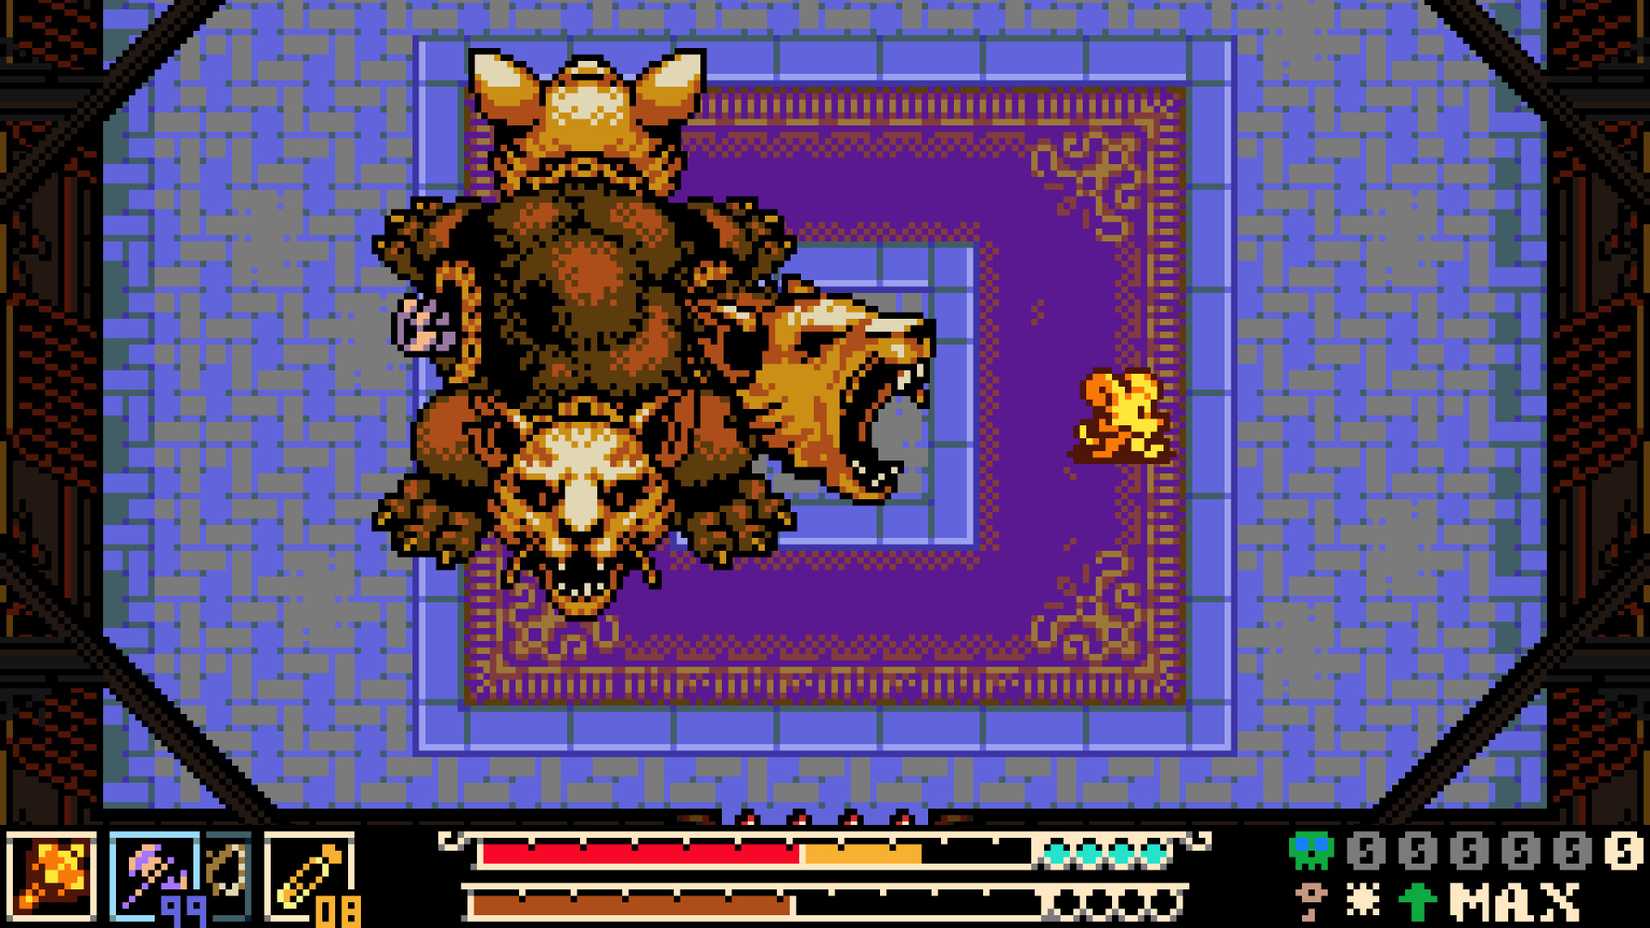
The Mined Mind is an enormous, chained brain entity surrounded by magical forces that seem to exist solely to make Mina's life miserable, resulting in an encounter that plays out like a chaotic puzzle.
Basically, your objective is to strike the multiple blue eyes of the chained brain. Since the boss remains rooted right in the center of the arena, you must use the outer borders of the stage to continuously manage your movement. Meanwhile, the brain won't just sit idly by waiting for you to strike it, and it will constantly unleash bouncing attacks on the floor to deal contact damage.
The complicated part of this confrontation is that you cannot focus entirely on the brain alone. There are four additional giant eyes positioned in the corners of the arena that summon two different magical projectiles to hunt you down: circles that require you to jump and burrow dead center into its core to eliminate it, and a sudden electrical shockwave. Also, a long, skeletal serpent creature will invade the floor tiles sometimes, using its elongated body to strictly limit where it is safe to step, though you can hit its head to quickly defeat it.
If you thought things were already bad enough, the developers behind Mina the Hollower clearly disagreed! A brutal second phase is triggered when the last eye remains on the brain, causing it to violently tear free from its chains and transit across the arena with a frantic bouncing movement that is difficult to avoid manually.
To emerge victorious here, saying a quick prayer might help – just kidding. What you actually need to do is maintain composure and avoid panicking when this phase triggers, as it is the greatest bottleneck of the fight! Simply maintain tunnel vision on the brain to shatter its remaining eyes while actively weaving past any incoming projectiles from the corner hazards. Utilizing your Subweapons is also a good alternative here, whether you need them to deal safe, long-range damage from afar or to quickly escape incoming traps.
 Next
Next
12 Hardest Final Bosses of All Time
Notoriously hellish and oh-so annoying.

Released May 29, 2026
ESRB Everyone 10+ / Fantasy Violence


![ELDEN RING NIGHTREIGN: Deluxe Edition [FitGirl Repack]](https://i5.imageban.ru/out/2025/05/30/c2e3dcd3fc13fa43f3e4306eeea33a6f.jpg)
 English (US) ·