.png)
.png) 5 hours ago
3
5 hours ago
3


Published Jul 3, 2026, 8:46 AM EDT
Melissa Sarnowski is a Gaming Writer at DualShockers who has been covering games professionally since 2022. She specializes in lists, reviews, and features, with additional experience writing guides for Hardcore Gamer.
Before joining DualShockers, Melissa contributed to Screen Rant, and she currently writes for CBR and Hardcore Gamer in addition to DualShockers. Her work focuses heavily on RPGs, horror games, MMOs, indie games, and simulation games, with recurring coverage of franchises such as Final Fantasy, Resident Evil, The Legend of Zelda, and The Sims. She holds a Bachelor of Science in English from the University of Wisconsin–Madison.
Sign in to your DualShockers account
Deltarune Chapter 5 is finally here, and as you might expect at this point, there are a number of items you can miss, which then makes you unable to complete content like the secret boss. Of course, there are a few options that don't have a clear consequence right now, but might in a future chapter. Because of this, I'm going to go through the chapter in a way that includes every piece of content that is—or seems—important for the game as a whole.
 Related
This means that smaller, consumable items might be skipped over since you can purchase them in shops, but I'll go through how to get the secret boss, the extra gear from after that boss, the fox locations, and the secret egg location. Of course, we'll also go through the full chapter route, as well. Let's get started.
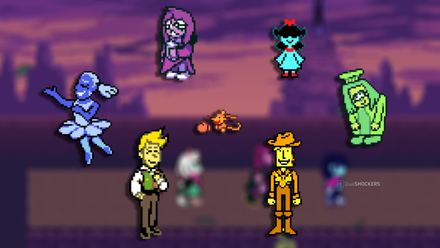
Festival Day

Chapter 5 starts with the day of the festival, which we've been waiting for. As you might expect from a festival in the normal world, there's not much for you to get in terms of items.
The chapter opens with Kris entering their bedroom from the window and retrieving the heart from the cage. While you can explore the house, there's nothing new to find. Instead, go downstairs and talk to Toriel, who asks you to make her honey toast.

Interact with the toaster to start it, then wait 10 seconds for the honey toast. You don't have to count, as the toaster lets you know when it's ready. Talk to Toriel again to give her the toast.
Outside your house, you find that the festival is being organized. There's not much to do here other than see some dialog, and I found Asgore’s comments interesting. When you're done talking to and eavesdropping on NPCs, head to the school and enter the Dark World.
You're greeted by Ralsei, who joins your party. Like in the normal world, you can go around and talk to NPCs for dialog if you want to. Then, head to the castle to pick up Susie.

Here, you're asked to help put together an outfit for Susie. It doesn't matter what you choose, because she's not going to wear it anyway. Susie will then join you and Ralsei, ready to go to the normal world for her date with Noelle.
First, go to the left and up to the third floor of the castle. At the end of the hall, there's a room behind a block. It's Ralsei’s. Susie will barge in to see why it's blocked off, leading to a bit of a sad scene.

Now, it's time to leave the Dark World.
Festival in Full Swing
When you exit the school, you find Noelle waiting, and she joins you and Susie. Now, you're able to explore the festival. However, there's no extra items or anything that you can get from the festival, meaning that you aren't required to participate in activities for that purpose. I still recommend talking to Kris' dad, sending Susie and Noelle onto the Ferris wheel, getting ice cream, voting for Susie and Noelle as King and Queen, talking to Noelle's dad, and giving Tenna to the house on the right of where Birdley talks to your group as the minimum of what you do. These events seem to be the most likely to have some kind of impact on relationships in future chapters, which is why I recommend them, but remember it's based on speculation right now.

Then, you want to go over to the beach for a cutscene between Susie and Noelle that ends with Noelle learning that her dad has fallen off the ladder he used to decorate, which means she has to leave. Susie's instinct is to go after her, but stop to get flowers from Kris' dad to cheer her up first. Naturally, a Dark World opens in the flower shop, meaning it's time for Kris and Susie to return to the Dark World.
The Dark World Garden
Once you enter the Dark World, you'll chase after Asgore and meet Flowery. As you continue following Asgore, you come across a series of wardrobes. You have to interact with each one even though there's nothing in them, as this allows you to find Ralsei in the fourth wardrobe. Skipping ahead to the last wardrobe doesn't let you go straight to adding Ralsei back to your party.
Next, you get to talk to Flowery, and then continue down the path to start the first battle of the chapter against two Floradinns. After the fight, take the path down, then to the left. This leads you to a chest with a Red Ribbon in it. Then, go back to where you fought the Floradinns and take the actual path for progression to the right.

This takes you to a simple puzzle where you push a block onto a pressure plate to remove the spikes and continue. The next puzzle is similar, but with the block and pressure plate separated, making you solve the mushroom puzzle.

Talk to the Floradinn, then bring it a mushroom from the area below. Now, it wants two mushrooms. Go back and take two. When you cross the stick bar, one mushroom falls off, causing the block to turn into a fox and run over. Grab the fox and place it in the square with the pressure plate, then when it turns into a block again, move it onto the plate, opening the path.
The next area has a bunch of scissors moving in patterns that will deal damage if they touch Kris. Right now, you just want to get to the top path, but we'll do more in this section later. I used the path to the left, then went right to get to the top. The left scissors are easier to move with, since their direction is going in the same way you need to move instead of against your path.

You find a door and two more Floradinns. Move to one and fight it. When you move to the second one to fight it next, Flowery appears and defeats it for you. He has some dialog, then the door is open when he leaves, letting you pick up the watering can.
Watering Can and First Pink Coin
The watering can lets you grow grass paths to reach areas you couldn't before. This means that you can go back to the area with the scissors and grab the chest from the center, which has Green Tea. Head to the left as well while you're there, taking the path on the other side of the scissors to shift the screen and find another chest, which has a Pink Coin.

Now, return to the gate and continue along the main path to progress. This takes you to a screen where you use the watering can to grow plants and lead the scissors to the shrubs, opening up paths. Take the path to the right first, where you find a larger watering can that you can use on the buds to create an image of Flowery's face, rewarding you with a chest that has the Thatchet weapon inside.

Go back and take the path up, which makes you fight the two Shearies. Continue going up, and the next screen has a chest in the corner. You can sneak between the bushes to reach it for more Green Tea. Now, you're continuing to the right, where you end up in a diner.
At the diner, Flowery blocks Asgore from seeing you again, but he does buy your group a root beer, so I guess that's nice of him. While in the diner, you can use the book to buy and sell items.
When you leave, you reach gates with strings, which are basically set speed boosts. Go through the first one, then down and across the lower gates. This makes a chest appear that has Revive Mint in it. If you didn't move down when going through the middle level's gates, you have to go through them again to remove a shrub blocking your path. Then, go through the lower gates again, and now you can use the stairs to go up, which also lets you use the stairs to reach the upper level.

Next, you end up in an area with a light block puzzle. Start the timer on the wall and hit the blocks as they light up, which removes the spikes and lets you continue to the right.

Unfortunately, you don't have enough party members to complete the puzzle of the same style in the next area, and that leads to Susie running off. You follow her with Ralsei's help, and the next puzzle you encounter is solved by Ralsei alone, who has run out of patience. After Ralsei tells you a story, return to the puzzle room, and Flowery will show up to complete the puzzle himself, opening the door on the wall for you to use.
Head through the door, and you reach a path back to the normal world. Flowery asks your group to return to the normal world because the Dark World isn't safe, and he doesn't actually want your group to get hurt. Of course, you don't get to leave, and if you try to, Susie will grab you and pull you back down.

You can't follow Flowery and Asgore right now, so you instead have to go to the left of the exit, which takes you to the diner again. This time, you're behind the counter, so you can exit through the door in the middle.
In the next area, you want to get to the top right corner, which gives you the watering can again. Stay in the area and use the watering can to open up paths, one of which takes you to a chest with Green Tea, and another on the far left of the area gives you a chest with another Red Ribbon.
By the chest with the Green Tea, there's a gate that takes you to a door in some rocks. This is the path that takes you to Aqua, who you fight alone as Kris.
Aqua and the Petal Feather
Fighting Aqua is more like a run-through of her abilities. The battle ended for me after she used her Omega ability, and she thought that I had won. As a reward, she lets you take the Petal Feather, which you find by following the path behind her.

Once you grab the feather, hit the statue to shift the world. Head left and find a beanstalk that you can climb, which lets you onto the roof of the building the feather was in if you jump to the right from the top. Continue to the right on the roof, which leads you to two leaves and a pink bell. Hit the pink bell to pick up your second Pink Coin.
With the coin collected, head back to that original set of vines you couldn't use before to follow Flowery. The path leads to Aqua again, who has you fight her bullet pattern. Once you get to the original vines, you can now jump on the leaves as platforms, thanks to the feather.

Keep climbing, and you finally reach Flowery and Asgore. Asgore is sent to Flower Castle, and Flowery invites you to continue to the castle if you're serious about taking Asgore back to the normal world.
Path to Flower Castle

The path is quite linear and just requires you to use the petal flower statues as you come across them. There's side content here, but we're actually going to come back after unlocking fast travel to collect it, because that's the most efficient way to go about it. Along the main path, you fight a book and Seth's bullet pattern.

Seth's bullet pattern is centered around a massive pair of glasses. Kris is actually useless here, and instead you're going to ACT on the middle of the glasses with Susie, then ACT on one of the sides with Ralsei, and then ACT on the middle again with Susie to deal damage. Repeat this sequence until you finish the fight.
After the fight, continue along the path to find some stairs, which take you up to a shop. Inside, you can purchase items, including the Mystery Key, which requires 10 Pink Coins. With this guide, you'll only have two of those coins right now. That's fine. We're going to collect 17 more Pink Coins after we reach Flower Castle and unlock fast travel. This is part of the chapter's secret boss.

For now, we're going to grab the Secret Egg quickly, and then continue to Flower Castle.
Secret Egg
The Secret Egg is in the wheat field to the right of the shop, sort of. Using the gates to get through the field means you cut down the wheat you go through. The first trip across, you spend your time dodging attacks from a bird-like creature.
There's another gate on the other side that lets you go back through the field, but there won't be more attacks after the first crossing. You need to go back across five more times, and each time, don't move up or down. You'll find that there's a bit of wheat that reappears each time, even though you cut through it.

After the fifth time, a balloon appears and moves to the left. Follow it, and you find that the screen where the shop should be is now different. Now, there's a dog using a balloon to float, and it's going to the flowers in this area in a specific pattern. You need to interact with each flower right after the dog to complete the puzzle without the dog being able to reset it. If the dog circles back to the first flower before you interact with the last one, the entire puzzle resets. Also, the dog gets faster after each flower you interact with.

This makes the watering can appear, which you need to use to grow the grass path to the left and move to the next screen. The catch is that when you pick up the watering can, the dog stops its cycle and comes at you to steal the watering can. Wait until it's on the other side of the room, then quickly get the watering can and move to the next screen.

The next screen has a tree. Go behind the tree and use the interact key to find that there's somebody behind the tree. This gives you the chapter's secret egg.
Back on the Castle Path
Leave the puzzle room, and you'll find that the shop is back. Now, go back through the gate and continue along the path to Flower Castle. You reach a section where you use flowers to jump across to the next cliff, which is where you find a series of chests. Open the chest at the top to get the Mistle Weapon.

Now, you have to go up to the door above by using the vines and jumping sideways, which lets you grab the chest for more consumables before going through the door after Seth and Aqua.
The next path requires you to follow Seth and Aqua with the use of hanging plants, which you get across with the help of having Ralsei become a platform with ACT. This path leads to a large toy windmill that you hit when Seth and Aqua are going to attack you, sending both of them along with your group up. As you go up, you need to keep dodging blades, which isn't too difficult. I stayed on the right half of the screen and limited my movements back and forth between the blades there.
After this section, you fight Seth and Aqua properly. Once you get through Aqua's Omega ability a few times, Aqua will find it boring to keep repeating attacks. She attacks you and Seth with her next ability before leaving. Now, you have to go through Seth's attack by dodging words. This is his only ability, and after using it a few times, he calls Aqua back to help him run away.

Once the fight is over, you get to climb the stairs to Flower Castle.
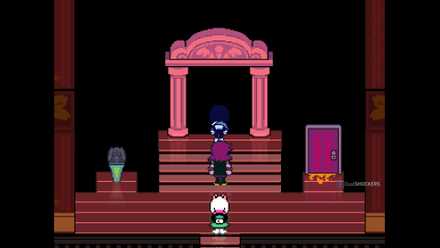
Flower Castle

You find Flowery and Asgore at the castle, and Asgore tries to send Kris and Susie away for their safety, telling them not to return. Of course, they immediately return and end up in the prison of Flower Castle upon landing.

While in prison, you can eat the moss if you want. This summons Seth and Aqua, with Aqua ending up in prison with you. Seth ends up freeing you, but is then accidentally trapped in prison himself.
 Related
When you head to the right, Ralsei rejoins you and Susie. Go up the ladder, then head right to the café. Here, you can visit Aqua and buy and sell items. Continue to the right, and you'll go through a hall of Terakotas, leading you to Seth and Aqua again, which then makes you go through a hallway of spinning knives.

At the end, hit the statue, to go up to the next level, where you dodge another set of knives, before reaching another statue to return the map to normal. Then, you find Asgore going through documents that fall to the ground where you are, letting you try to read them before continuing to the right.
When you get to the orange door, move the two blocks up so that you can reach the ledge with the orange key. Jump and strike the key to cut the string holding it, and the orange door will open.

Orange will make you do a platforming section that includes dodging their boxing gloves. You can get rid of the gloves for a moment if you attack them. Once you get through this section, you'll find yourself in another diner.
At the diner, you meet Seth again, and he tries to get Green to fight you. Green instead gives you a big piece of cheese to eat.
Find Foxes
Head through the door to the diner that Green went into, and you meet Aqua, who wants you to find three foxes in order to progress. We're going to grab all five. They're kept within the same areas, so you don't have to do a lot of running around the castle.
Start by going to the right, dodging paw projectiles. There's a chest at the end of this hall, but it only has Flowery Dollars in it. If you go down the hall and back, you'll notice that one of the paws is a fox. You can grab it to collect it, and then take it to Aqua.

Next, enter the doors by Aqua to find a room of Terakotas. The fox here will run around the room. Chase it, and it'll end up going to the entrance and leaving on its own, which counts as collecting it.

Head back into the Terakota room if you left it and use the door in the top-right corner. There's a screen with jumping objects that you can lift, and then you just grab things until you grab the fox.

Now, back in the Terakota room, move a Terakota in the top-left corner of the room to find a hidden door. In that room, interact with the screen to get the fox.

Finally, in the Terakota room again, the last fox is in the bottom-right corner of the room. Push statues off the ledge until you find it.

Now, return to Aqua, who was actually a Netski in disguise. You'll have a quick fight that ends with Seth interrupting, and then you can open the fox door to the left to get your third Pink Coin. Remember, we'll be collecting the majority of these coins once we have fast travel available.
Orange and Green
Leave the fox room and take the stairs up to find Seth and Orange. To the left, there's another puzzle that rewards you with your fourth Pink Coin. Arrange the blocks as seen in the image below, then use Ralsei as a platform to get to the left. Cut Ralsei down to lift the screen, letting you move to the right, then use Ralsei to bring the screen down again to go up, which lets you hit the bell and get the coin.

Return to the right and use Ralsei to climb up to the area where Seth and Orange were talking. This leads to a section of platforming that makes you keep using Ralsei to pull screens up and down to reveal shadow platforms and knives that you need to dodge. Eventually, you meet Aqua and Seth again.
Here, you fight an ACT-less version of Seth's bullet pattern. All you need to do to beat it is hit Orange's boxing gloves at the glasses. After three hits, the fight ends.

Follow after Orange and through the door with the Deltarune symbol on it. After fighting with Orange and Green verbally, you'll get into an actual fight with them. Attacking is useless, because they just heal the damage. Instead, you have to use Kris' ACT commands on Green and eat all the food that Green's attacks create to restore health. After enough ACT commands, the fight ends in friendship.

Now, you're able to use the right-side scissors to cut one of the bushes. You can stop in the café if you want to buy items, otherwise it's time to tackle the left side of the castle.
Blue and Yellow
Eventually, you come to a statue you hit for some platforming. At the top, you can go to the right for Flowery Coins, but the left is the path for progressing. This takes you to the Blue and Yellow doors. As you might expect, we have to get some keys.
Continue left for another statue and more platforming. This takes you to Yellow's bullet pattern, which you beat by using ACT to lower it and then attacking. At the end of the hall, you get the Yellow Key.
In the Yellow Room, you need to find evidence, so start by heading to the left. At the bottom left, you pick up the Yellow Shred. Then, go up to find Boot Oil at the top of the path. Next, head right and go onto the dock after the Floradinn to get Scissors from Aqua.
Continue to the right and down, where you find Yellow's hat and start digging a hole before the next Yellow door opens. In the room you enter, grab the purple book by Seth.

Next, you have more platforming to do while dodging hats and knives until you find Yellow and Aqua at the top. Here, you have to break the gun in under two minutes to save Yellow, who then throws himself in jail.
Heading to the left, you meet Blue, who you then have to follow as they search for Yellow. As you follow, you pass by the place where Seth and Aqua were, letting you pick up the piece of evidence: train plans. Now, go to where you made a Yellow-shaped hole and listen to Blue, then pick up the red platter evidence and continue after him.

From here, enter the Blue door. This is going to lead to jail where you enter a fight, but the fight is based on using evidence you collected to solve cases. Here are the answers:
- Floradinn crushed flat: Accuse Seth using his book.
- Yellow shirt was vandalized: Accuse Green with the yellow shred.
- Green's handkerchief was stolen: Accuse Aqua with the red splatter.
- ACT on Blue to get the Blue String.
- Yellow's petals have gone missing: Accuse Blue with the blue string.
The fight ends with the last case accusing Blue.
Moving on, you can enjoy a scene with Ralsei in the hot springs. At the end of the hall, you can cut down the second shrub to open the main path. Take the watering can and use it on the sprout to create a giant beanstalk that you can climb.
Fast Travel and Pink Coins

We're now at the final stretch. First, we have to get through some sections against the flowers to open up fast travel, at which point we'll take a quick interlude to grab the rest of the Pink Coins and fight the hidden boss.
First up is Seth. You can either get Mercy to max to spare the Shinobeetle with him or tire it out to use Pacify. Otherwise, Seth will keep healing it to max health.
Next, you have a platforming section with Yellow and Blue that involves platforms being destroyed, so you have to be quick.

Then, you have Aqua, who throws knives that you have to dodge through a platforming section, which leads you to Seth again. Using Intimidate and Spare can get you through this fight, as it ends when the Shi leave. I prefer getting them tired and using Pacify.
Next, you come across Green, which unlocks fast travel through the door to the side. Now, we're going to grab the rest of the Pink Coins for the hidden boss before continuing. Here's where you find the remaining ones.
|
Pink Coin Number |
Location |
|
5 |
Fast travel to Hopschef in the Garden. Head right and up the vines to a gate that leads you to a Pink Coin at the end. |
|
6 |
Travel to End of Garden. Go to the right until you find a statue. Hit it. Run left to a gate, then through another gate. After this, you find a pink bell that breaks for a Pink Coin. |
|
7 |
Travel to First Climb in the Cliffs. Go down and activate the statue. ACT on the vine and use Ralsei to climb it. The Pink Coin is on the left about halfway up the vine. |
|
8 |
Return to the vine from number 7. Continue to the top and through the wind. Slide down the mountain, go left, climb the vines, then jump to the right and let the water send you down to the coin. |
|
9 |
Travel to Shop in the Cliffs. Head to the right, through the field, and hit the statue. Use Ralsei to climb the vine and hit the pinwheel. Go down until you reach vines and use the lower one. Move to the right until you find the Pink Coin bell above a dog with cheese. |
|
10 |
Travel to Netskie Climb in the Cliffs. Go past the foxes and through the cave. Go through the gate, past the pinwheel, and find the Pink Coin after the jump. |
|
11 |
Travel to Foyer in the Castle. Go up the stairs on the left and continue until you reach stairs that go down outside. Hit the statue, get through the beetles, then find the bell in the next screen. |
|
12 |
Travel to Blue's Room in the Castle, then enter Yellow's Room instead. Hit the statue and go east to find flowers, then use these to jump and reach the bell. |
|
13 |
Travel to Mysterious Puzzle in the Castle. Move the piece lying down to the right half of the highest screen for a platform. Move the standing block to have one section in the lowest screen, then its left side in the square screen section on the left for another platform. Use them to jump to the right and get the coin. |
|
14 |
From number 13, continue going up until you reach a doorway. Go left and find a screen you can break, then enter the next room. You need to hit the glove against the bell to get the coin. |
|
15 |
Travel to the Foyer in the Castle. Go to the Terakota room and knock off all the statues in the bottom right. Then, go to the east of the café and knock off those statues. Return to the foyer and leave the castle. Go left and find a set of plates you need to push the statues onto, rewarding you with the coin. |
|
16 |
Go to the Terakota room again and return to the puzzle we used earlier to get a coin. Go through the puzzle again, but keep going up until you can reach outside. Use the stairs and continue to the right. Grab the mushroom and place it to the left of the pink box. Go through the hole that opens to reach the coin. |
|
17 |
Return to Green's shop and go right. Use the flowers to reach the top, then go left. Continue until you find yellow flowers that you use to cross the room for the coin on the other side. |
|
18 |
From 17, return to the Deltarune symbol you passed and fall down using a pinwheel. Destroy the flowers as you fall and dodge projectiles. The bell will be above the door on the right at the bottom. |
|
19 |
Travel to the Foyer in the Castle and enter the café. Keep going right until you reach stairs. Open the door at the top of the stairs to find the last coin in the chest behind it. |
With the coins, you can purchase the Mystery Key from the shop in the cliffs.

Use the key on the Pink door at the top of the castle to fight Mad Mew Mew. You can't deal damage to her, so you need to just fill up her Doki meter three times to end the fight. The end of each phase has you answer three questions correctly to move on. Your turns are going to be spent using Defend, Flirt, and healing items, but Ralsei needs to spend his time using Lovely Boy to get TP for Giga-Flirt. As for the questions, here are the answers for each phase:
- Phase 1: Yes, you want to walk her home. Yes, you think she's cute. No, you don't wish you never met her.
- Phase 2: Pick the answer that matches both items. As an example, Susie's Jeans and a Female Dog would use Husky as the answer. There's a lot of possible pairings you might get, so it's all about finding the double meaning.
- Phase 3: I got scared, Anyone else's, Love us both.
After the phase 3 questions, you end the fight. Now, you're able to use the remaining Pink Coins to purchase items, and you'll receive the Flowery Scarf for 1 Flowery Coin as well.
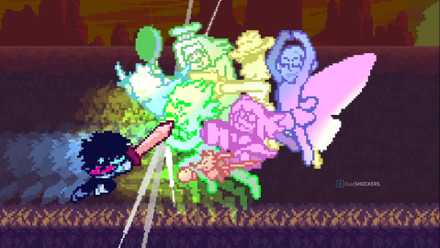
Flowery Boss

The fun has ended, and now it's time to finish the chapter. Return to Green's Shop and finish platforming and dodging sections to reach Flowery. The key to this fight is using ACT and getting TP. The bamboo sections are done using the Dash key excessively. For phase one, you want to use the Pose ACT.

Phase 2 has Flowery summon the other flowers in pairs, meaning you'll dodge their unique attacks. For Seth and Aqua, use Spin. Orange and Green get Praise. Blue and Yellow get Justice. After each pair is dealt with, you move to the next phase.
Phase 3 is more bamboo smashing, then using Susie's Idea ACT. This takes you to the last section of the fight where you just need to hit Flowery until he collapses.
With that, you've completed Deltarune Chapter 5 in its entirety and get to enjoy the ending. Or not, as I felt pretty sad about it all at the end.
 Next
Next
Deltarune: Flowery Boss Fight Guide
Anything is possible with the power of friendship!

Systems
![]()

Released October 31, 2018
ESRB Teen / Language, Suggestive Themes, Mild Blood, Fantasy Violence
Engine gamemaker
Prequel(s) Undertale
Number of Players Single-player


![ELDEN RING NIGHTREIGN: Deluxe Edition [FitGirl Repack]](https://i5.imageban.ru/out/2025/05/30/c2e3dcd3fc13fa43f3e4306eeea33a6f.jpg)
 English (US) ·