.png)
Inside the Deku Tree is the first dungeon experience in The Legend of Zelda: Ocarina of Time, and you'll reach it by, well, going inside the Great Deku Tree.
The Great Deku Tree is the forest's guardian, but he's been afflicted with a curse by the evil Ganondorf. He's summoned you to test your courage and rid the curse that has been plaguing him. To do so, you need to head inside his mouth. However, he failed to tell you that you're entering inside an eerie dungeon full of creepy crawlies and man-eating plants.
Here's how to complete the Inside the Deku Tree dungeon in Ocarina of Time.
[Ed. note: This guide is for the Nintendo 64 - Nintendo Classic version of the game, which is playable if you have a Nintendo Switch Online + Expansion Pack membership. This walkthrough uses the updated control scheme, so if you're playing on a Nintendo 64 or 3DS, you may need to press different buttons.]
Part 1: Find the dungeon map
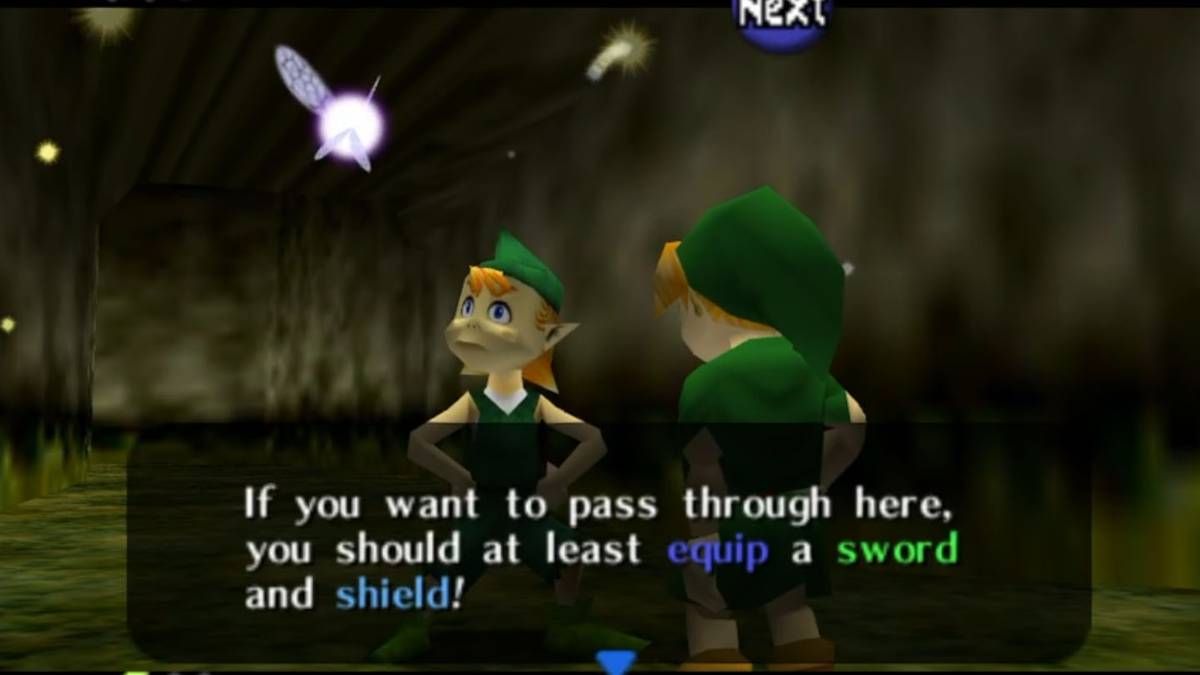
After you equip a sword and shield and get past Mido in the Kokiri Forest, follow the path and defeat the withered Deku Babas, the plant-like enemies, blocking the way. This is a great opportunity to practice your Z-targeting with a real enemy, as these plants won't attack back. Lock on to an enemy by pressing ZL and swing your sword by pressing B. You can also switch targets by pressing ZL again. Just don't get too close or else you might take damage. Pick up the Deku sticks that they drop as they'll be useful on later in the dungeon. Make sure to equip them to one of your "C buttons" by opening the Select Item menu, hovering over the stick, and then moving the right joystick either left, down, or right.
 Image: Nintendo via Polygon
Continue down the path and speak to the Great Deku Tree, who will tell you to test your courage by heading inside his mouth. In the middle of this area, there's a hole that is blocked off by a giant spider web. Along the edges, you'll find more Deku Babas, but these Deku Babas are not withered — meaning they will attack you.
 Graphic: Johnny Yu/Polygon | Source image: Nintendo via Polygon
These are optional enemies, but it's important to know that Deku Babas can provide two valuable resources: Deku sticks and Deku nuts. The easiest way to deal with them is to attack them as they're lunging, which will make them stand up straight like their withered counterparts, and then finish them off with another swing, which will give you a Deku stick. The other way is to block their lunging attack with your shield and then attack them with your sword. This will provide you with Deku nuts, which can be thrown at enemies to stun them, making combat a little easier.
 Graphic: Johnny Yu/Polygon | Source image: Nintendo via Polygon
If you'd like to grab a few Deku nuts, defeat the enemies and then climb up the ladder or vine wall to the next floor. Follow the path until you reach a chest. Open it to find the dungeon map, which will allow you to see the dungeon's layout in the Map menu. Alternatively, you can press L to have the dungeon minimap appear in the bottom right corner of your screen.
There are a bunch of skullwalltulas, spider creatures with skulls on their backs that specifically climb on walls (implying there are other spiders that aren't on walls), behind the chest, but you don't have a way to deal with them for now. Instead, you'll need to grab the Fairy Slingshot, which can be found in the room just down the hall.
Part 2: Unlock the Fairy Slingshot
Look to the right of the chest where you found the dungeon map, and follow the path to the door. Make sure you're close enough to the door so that the Action Button says the word "Open," and then press A to open the door.
 Graphic: Johnny Yu/Polygon | Source image: Nintendo via Polygon
However, quickly target the enemy inside and put up your shield. The enemy, officially called a Deku Scrub, will shoot a Deku nut at you, but if you block it with your shield, it'll get sent back to them. After you reflect the Deku nut, run up to them and they'll give you a tip: hold forward when you jump off a high cliff to avoid taking fall damage.
 Image: Nintendo via Polygon
Head into the next room where you'll find a floating platform and a chest across from you. Jump to the platform, then to the vine walls, and climb your way. It's okay if you fall as you can just go up the vine wall. Open the chest to find the Fairy Slingshot, and equip it in the Equipment menu.
 Graphic: Johnny Yu/Polygon | Source image: Nintendo via Polygon
Bring out your Fairy Slingshot by moving the right joystick in its associated direction, and then aim at the ladder on the opposite wall. Remember that the vertical camera controls are inverted, so you'll need to move the left joystick down to look up and vice versa. When your slingshot is aimed at the ladder, move the right joystick in the same direction again to shoot it. If done correctly, you'll hit the ladder and it'll drop to the ground. Then, press A again to unequip the slingshot. Before you drop down, if you're low on health, climb up the vine wall beside the chest to find another chest with a recovery heart inside.
 Graphic: Johnny Yu/Polygon | Source image: Nintendo via Polygon
Once you're done, slash away at all the plants in the pit to get some free rupees and climb up the ladder to exit the room.
Part 3: Find the compass
With the Fairy Slingshot in hand, you can now deal with the skullwalltulas. For the two that are lower on the wall, you can target them with ZL and shoot them with your slingshot. For the third, you'll need to aim at it manually.
 Graphic: Johnny Yu/Polygon | Source image: Nintendo via Polygon
Once they've been dealt with, climb up the vine wall, shuffle over to the side until you're above ground, and drop down to enter the third floor. On this floor, there's one door and the middle area is covered in spider webs. There are three holes in the web, but if you look at the floor, you'll see a skulltula's shadow. If you try to approach, you'll find that these skulltulas are much bigger and more terrifying than their wall counterparts.
 Graphic: Johnny Yu/Polygon | Source image: Nintendo via Polygon
First, go inside the door. There's a chest straight ahead of you and another chest and a gold skulltula, a collectible that can earn you rewards later on, in the area to the left, but the left side is guarded by a skulltula.
 Graphic: Johnny Yu/Polygon | Source image: Nintendo via Polygon
We recommend dropping into the pit and walking close to the shadow in front of the left wall to make the skulltula drop down. Then, wait for the skulltula to turn around and hit them on their belly. Repeat this process until you defeat them.
 Graphic: Johnny Yu/Polygon | Source image: Nintendo via Polygon
Turn to the left to find a Deku Baba. If you don't have a stick, wait for them to lunge at you, hit them, and then defeat them. Climb the vine wall back up to the start and step on the platform in front of the lit torch. This will raise the circular platforms, allowing you to reach both the gold skulltula and the compass. The compass will mark the location of hidden chests on the map for you, so you don't have to go out of your way to look for them.
 Graphic: Johnny Yu/Polygon | Source image: Nintendo via Polygon
Return to the starting platform and equip one of your Deku sticks. Walk up to the lit torch to light your stick on fire, and then bring it over to the unlit torch behind you. This will light the torch and unlock the exit.
 Graphic: Johnny Yu/Polygon | Source image: Nintendo via Polygon
Part 4: Proceed through the basement
Head back to the main room on the third floor and defeat one of the skulltulas by attacking its belly (if you want more rupees, defeat them all). Remember the huge hole blocked off by spider webs on the first floor? If you look off the edge, you'll see it just below you. Walk off the edge and let go of the joystick. You'll land on the web, breaking it in the process. If you think you'll miss, make sure to hold forward to avoid taking fall damage.
 Graphic: Johnny Yu/Polygon | Source image: Nintendo via Polygon
On the first level of the basement, there are three different platforms: one to the northeast, southeast, and west. The platforms in the northeast and southeast are reachable by a hidden platform in the shallow water, but the one in the west is unreachable for now. There are also two gold skulltulas: one on the eastern vine wall and one on the bars in the north.
 Graphic: Johnny Yu/Polygon | Source image: Nintendo via Polygon
First, climb onto the platform in the northeast, and step on the button. This will light the torch and reveal that fire can destroy spider webs. If you're low on health, open the chest behind the torch to get a recovery heart.
 Graphic: Johnny Yu/Polygon | Source image: Nintendo via Polygon
In the southeast corner, there's a door that is blocked off by spider webs, so you'll need to light a Deku stick on fire and carry it over. Make sure to land on the platform in the water, and then jump over to the platform in the southeast otherwise the water will snuff out the fire.
 Graphic: Johnny Yu/Polygon | Source image: Nintendo via Polygon
Before you head inside the next room, there is another Deku Scrub waiting inside, so be prepared to target them and lift your shield. After you reflect the Deku nut at them, walk up to them, and they'll teach you that you need to punish their brothers in the proper order: 2, 3, 1.
 Image: Nintendo via Polygon
Although you beat the Deku Scrub, the door to the next room is still locked, but if you look above it, you'll find an eye. To open the door, shoot the slingshot at the eye.
 Image: Nintendo via Polygon
In the next room, there's a moving platform on top of water, but it's unsafe to stand on as you'll run into a rotating spiky bar. To make it safe, you need to lower the water. Look in the water, just below the bar and along the southern wall. You'll spot a submerged button on the floor. Swim over until you're right above the button and hold A to dive into the water. You should hit the button, which will lower the water level. Get on the platform and jump off when it reaches the other side.
 Graphic: Johnny Yu/Polygon | Source image: Nintendo via Polygon
In this area, the door to the exit is just a little out of reach, and there's a skulltula blocking your path. Defeat the skulltula, and then move to the south side of the large block. Move up just beside it and stop moving, so that your action button displays Grab. Hold down A to grab it and then move forward until you can't anymore. Then, move to the east side of the block. Continue walking into it and press A to climb onto it. Climb up again and go through the door into the next room.
 Graphic: Johnny Yu/Polygon | Source image: Nintendo via Polygon
For this room, use a Deku stick to light the unlit torches. If you're low on sticks, you can grab a couple more by defeating the Withered Deku Babas in the southwest and southeast corners of the room.
 Image: Nintendo via Polygon
Continue into the next room where you'll find a skulltula immediately blocking your path. Hit its belly and continue into the room, but be careful of the shadows in the center of the room. If you get too close, Gohma Larva will drop from the ceiling and attack you. They'll glow red just before they're about to jump at you, so put up your shield and then swing your sword. They'll run after you hit them once, so chase them down and get the final hit to defeat them.
 Graphic: Johnny Yu/Polygon | Source image: Nintendo via Polygon
There are two paths blocked by spider webs: one in the northwest and one in the east. The northwestern path will lead to a Deku Baba and a dead end, so head to the path in the east and crawl through the tunnel.
 Graphic: Johnny Yu/Polygon | Source image: Nintendo via Polygon
You'll end up back in the room where you first landed on the first floor of the basement, but don't jump off the ledge right away. In this area, you'll find a movable block, another hole blocked by a spider web, and a few Deku Babas. First things first, push the block into the water. Hop over to the lit torch and light one of your Deku sticks. Quickly bring the lit stick back to the hole and move your joystick in the Deku stick's associated direction to swing it at the web blocking the hole or roll over the hole to light the web on fire.
 Graphic: Johnny Yu/Polygon | Source image: Nintendo via Polygon
Drop in to get to the lowest and final floor of the dungeon.
Part 5: Solve the brothers' riddle and defeat Gohma
If you're low on health, swim over the recovery hearts. If not, swim to land, where you'll encounter three Deku Scrubs. Using the hint you learned earlier, you'll have to reflect the Deku nuts at the second Deku Scrub, then the third, and finally the first.
 Graphic: Johnny Yu/Polygon | Source image: Nintendo via Polygon
After you hit the final Deku Scrub, they'll give you a hint on how to defeat Queen Gohma: strike with your sword while she's stunned.
Gohma will be in the very next room, so heal up using the recovery hearts in the water if you haven't already. After you head inside, the door behind you will automatically close and the lights will dim. There are a few things to know before you start the fight:
- Gohma, like the larva, has a huge eye. It will glow red when she's about to attack, so either stay away or hold up your shield when it does.
- Gohma is invulnerable until she's stunned.
- Gohma's eye is her weak point. Remember the eye puzzle earlier in the dungeon? You'll need to shoot your slingshot at Gohma's eye just like before to stun her, but she'll close her eye if you do it at the wrong time. Wait for Gohma's eye to glow red, then shoot your slingshot.
- Remember Z-targeting is your friend. Your slingshot will automatically shoot at Gohma's eye, so you don't have to manually aim.
When you're ready to start the fight, move your right joystick up to go first-person, and look up toward the ceiling to spot Gohma.
 Image: Nintendo via Polygon
Stun her with the slingshot by hitting her red eye, and start wailing on her with your sword. She'll move up to the ceiling after being stunned once. Get your slingshot ready, and hit her eye when it starts to glow red — dropping her to the floor. Swing your sword again, and if you landed enough attacks already, you can defeat her after just two stuns. If not, stun her again and you'll be able to defeat her after a few more swings.
 Graphic: Johnny Yu/Polygon | Source image: Nintendo via Polygon
If you miss her eye when she's on the roof, she'll drop three eggs that hatch into Gohma Larva. Quickly hit the eggs with the sword to prevent them from hatching. If they hatch, make sure to hold up your shield when their eyes glow red, and then go in for a swing after. Each one should take two hits to defeat, but try your best not to get surrounded by them as that is when they're the most dangerous.After you've defeated Gohma, pick up the heart container to increase your maximum life by one heart, and walk into the glowing blue light to complete the Inside the Deku Tree dungeon.


![ELDEN RING NIGHTREIGN: Deluxe Edition [FitGirl Repack]](https://i5.imageban.ru/out/2025/05/30/c2e3dcd3fc13fa43f3e4306eeea33a6f.jpg)

 English (US) ·