.png)
 3 months ago
81
3 months ago
81
A few nights ago, I was playing rental store simulator Retro Rewind when I got distracted by the final 20 minutes of The Terminator. As I watched the movie in my store on a tiny CRT screen in the corner, I forgot I was supposed to be running the place. Thankfully, the digital employee I’d hired a few days before checked customers out. And if you, too, want to watch old movies in a digital recreation of a ’90s-era rental shop, well, I can help you out.
I love Retro Rewind, a recently released video rental store simulator out now on Steam. As someone who grew up loving trips to our local Blockbuster, Retro Rewind is a very cozy game for me. Something about being surrounded by shelves filled with movies and garish carpet covered in stars and cartoon cameras makes me happy. And like any good rental store, your store in Retro Rewind has TVs. But by default, these play short, fairly generic clips created in-game. One video clip, however, tells you to replace this file with your own video file.
When I saw that, I got excited. Could I play any ’90s movie I wanted on these TVs? The answer was yes. Yes indeed.
That’s the real purpose of these TVs. And I’ve taken advantage of this nifty feature to, as mentioned above, put all of The Terminator (via VHS rip) as well as a bunch of ’90s trailers and more into my humble rental shop. If that sounds awesome to you, then let me walk you through the fairly easy steps to get this working in your own store. Just be careful you don’t get distracted watching a movie while you should be working.
Decide on and download the video you want to play on your in-game TVs
First off, you need to figure out what you want playing on your TVs in Retro Rewind. There really isn’t a limit to what you could add to the in-game TVs, assuming you can find a digital video of it online. I’ve seen people put ’90s-era cartoons, movies, commercials, and trailers into the game. You could do music videos. Or create your own complication of stuff that will then loop endlessly on your shop’s TV screens.
I’d recommend checking out the Internet Archive for cool VHS rips if you want to keep your content appropriate for the era, and hitting up YouTube for trailers and ads. For the purpose of walking you through how to do this, I’ve selected this two-hour-long Blockbuster TV in-store promo tape I found on the Internet Archive.
One thing to keep in mind is that at the moment, you can only get three videos, each with its own channel, working in Retro Rewind. So you can’t dump 50 trailers or TV episodes into the game. Instead, they’ll need to be combined into one longer video.
Converting videos to work in Retro Rewind
Okay, once you’ve downloaded a video to add to the game, you’ll next need to convert it so it works properly in Retro Rewind. This isn’t too tricky. The easiest way to go about this is downloading and installing the free program Handbrake, which is a very useful video conversion and porting tool.
 © Kotaku
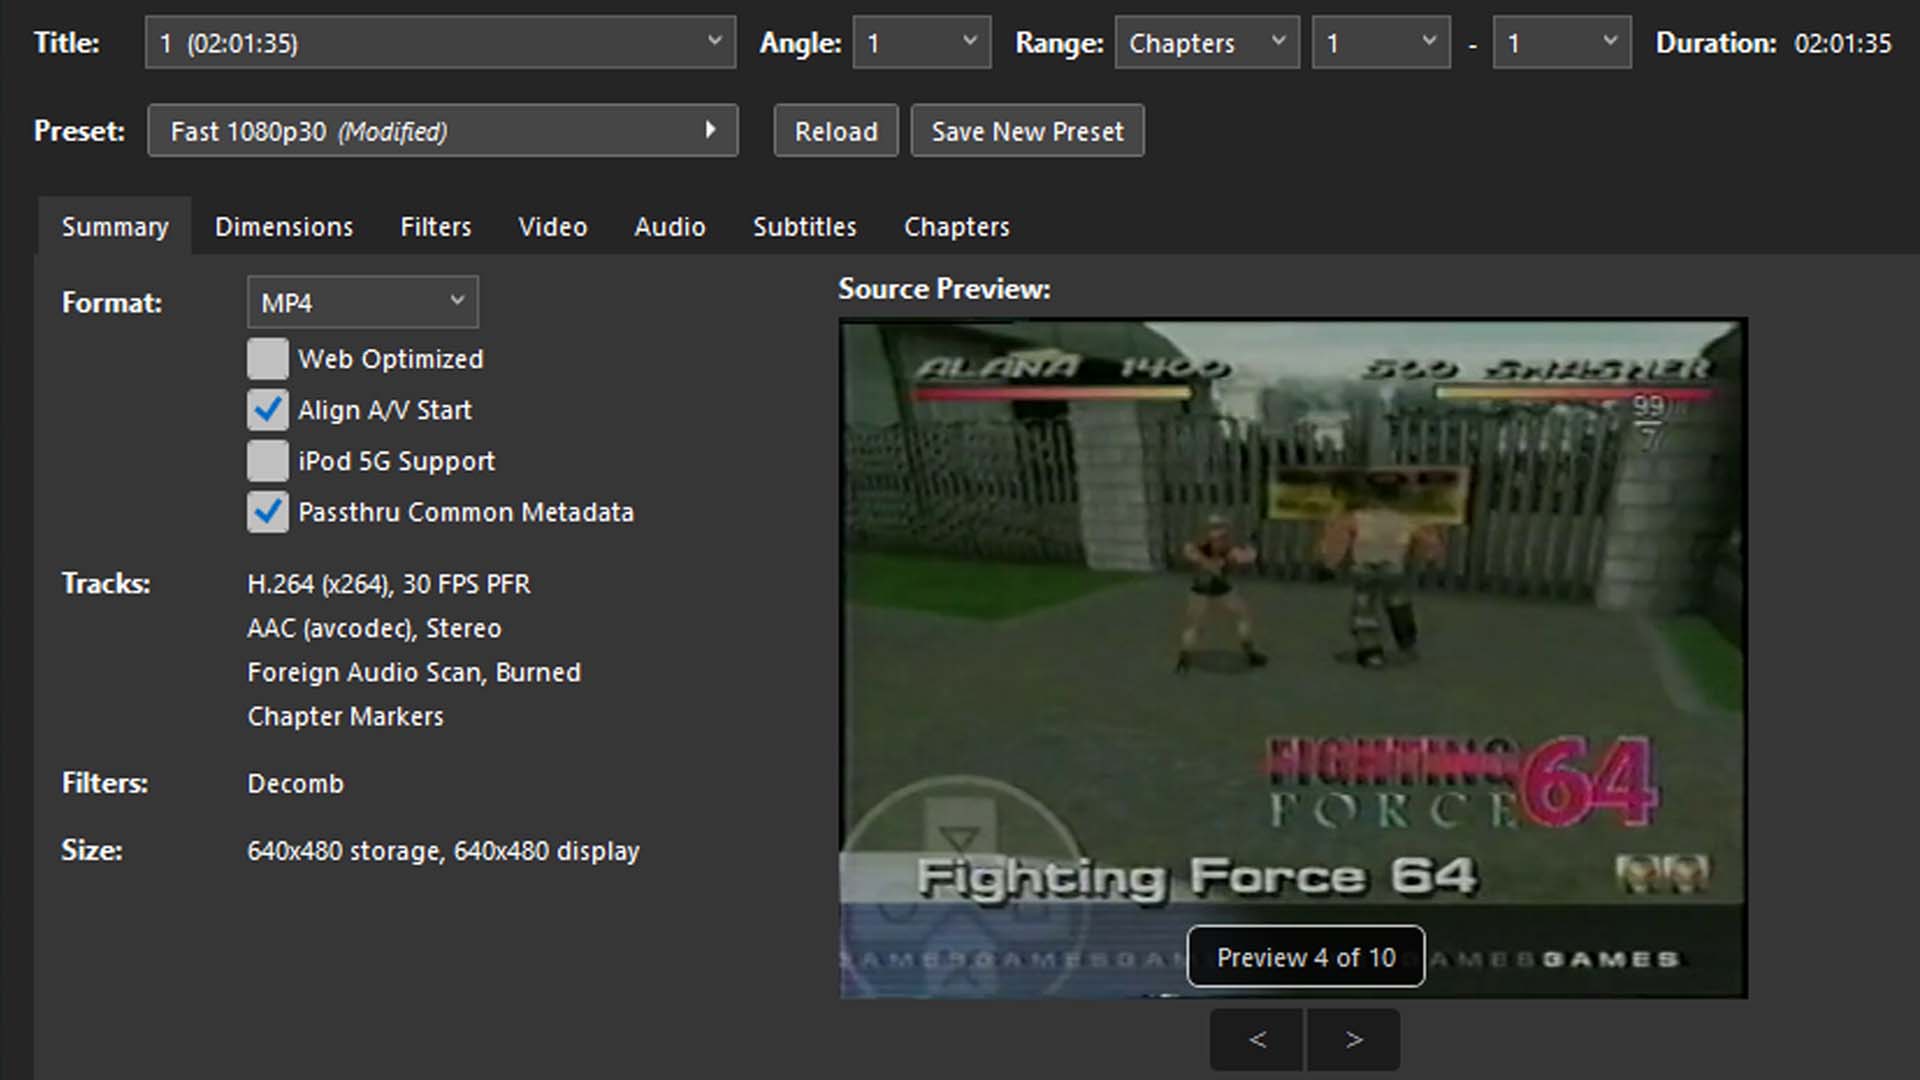
Once that’s installed, drag your desired video file into Handbrake. Then make sure the format is set to MP4. Next, hop over to the “Video” tab and make sure H.264 is selected under “Video Encoder.” Finally, go to the “Dimensions” tab and look under “Resolution and Scaling.” There, you should find an option to change the “Resolution Limit” from 1080p HD to custom. That will let you set the exact size for the converted video. You’ll want to go with 512×512 as this is the recommended size for video files according to Retro Rewind. Change the name of the file at the bottom to something memorable and take note of where it’s being saved, likely your videos folder in Windows.
Now hit that big green button at the top to start encoding the file. Depending on your computer and the size of the video file, this could take a few minutes or a lot longer. Wait for it to completely finish before moving on or closing Handbrake.
Placing your custom videos into the game
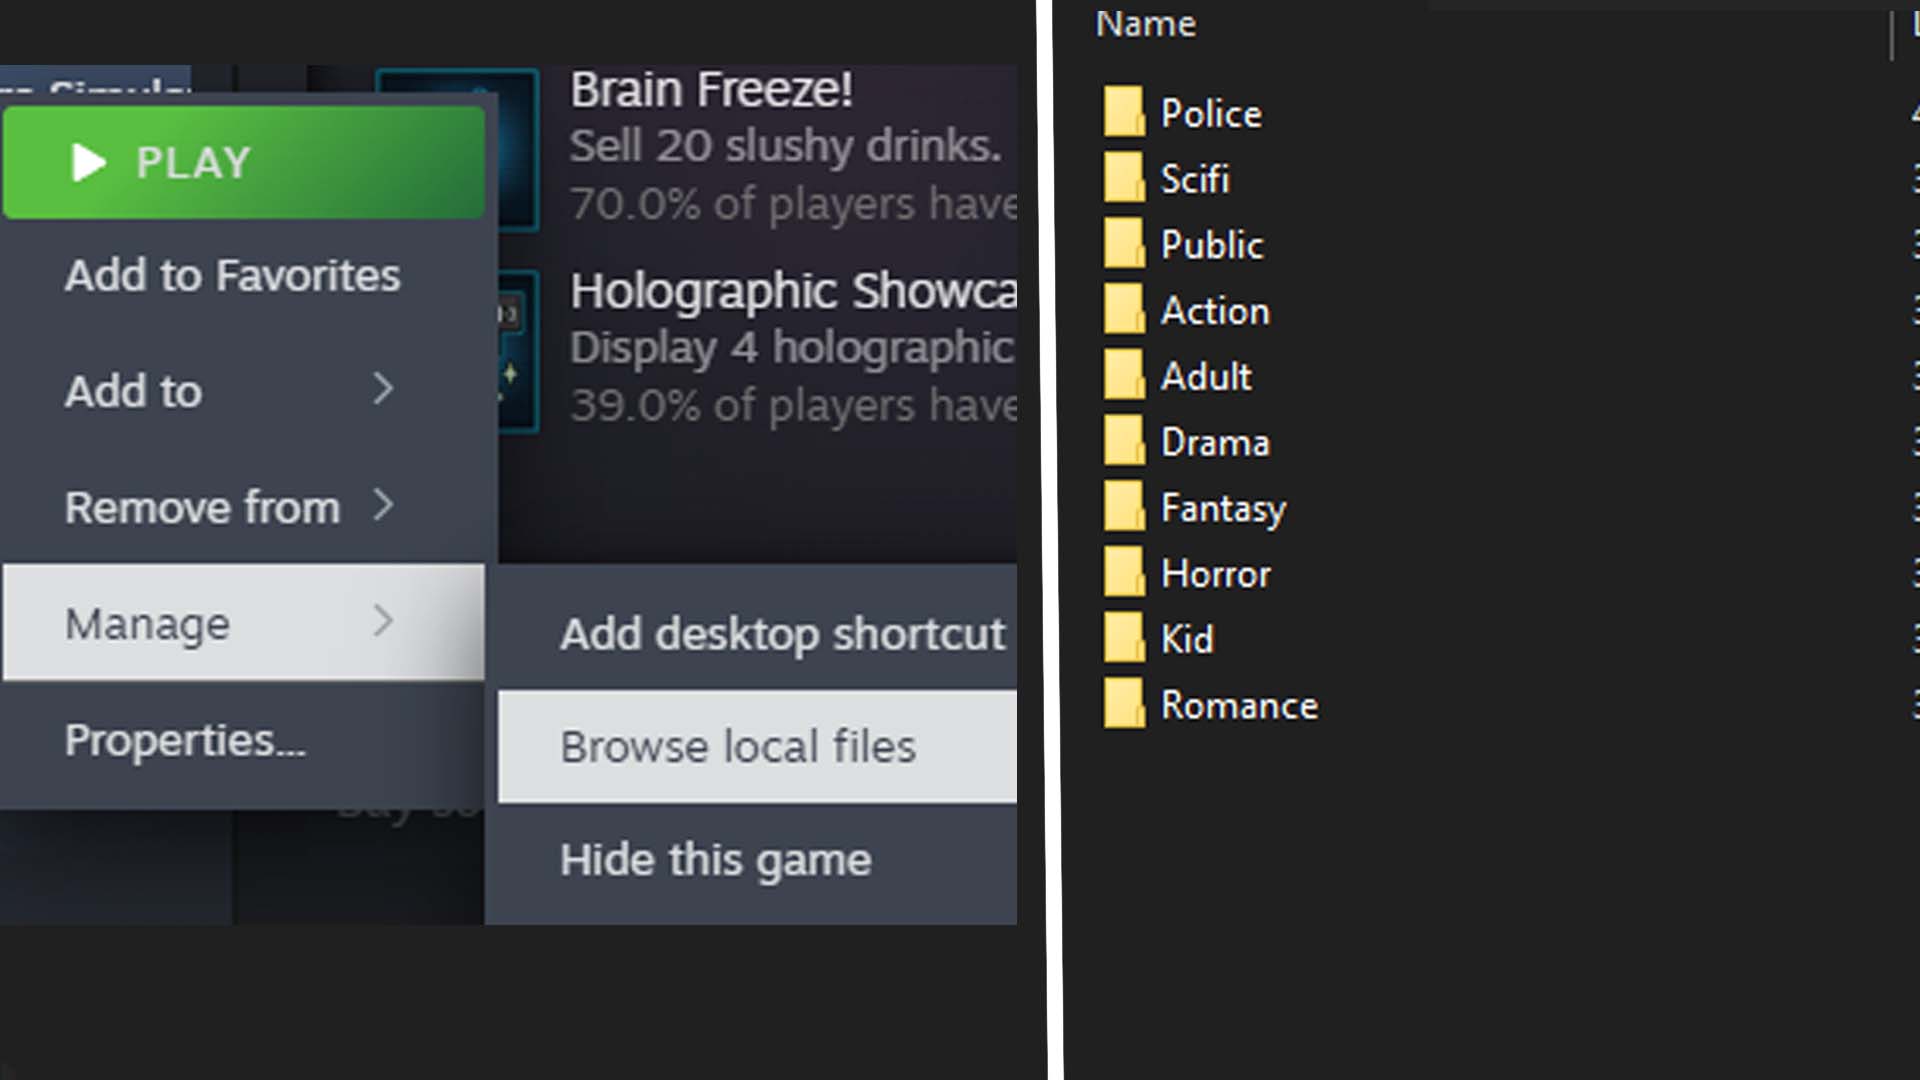
Once the file has been converted to the format and size we need, it’s time to place it in Retro Rewind. Find the game in your Steam library, make sure it’s installed, and then right-click its name in Steam. Look for “Manage” and click “Browse local files.” This should open up the game’s install folder. Click the folder labeled “Retro Rewind,” then in there click “Content,” and then “VHS,” and finally open up the “Movies” folder within. This will bring up a list of folders that are the channels available on the TV.
As of April 2, the game only supports three of these channels: Police, Sci-Fi, and Public.
 © Kotaku
Pick one of those three folders and open it. In here, you should find one file named something like “RR_Channel_ Public.mp4.” This is where we’ll place that converted video from earlier. Grab it and drop it in here. Now, rename the original file that was in here and add a simple X, A, or 2 to the file name. Copy that file name onto the newly added video you converted, but make sure to delete the extra letter or number you added. (This step will make sure you can always go back and replace your video with the OG video easily in case you want to or something breaks later.)
Now close that folder and hop to Steam. You should be able to boot up Retro Rewind and change the channel until you find your video there waiting to be watched. Now be careful you don’t get too distracted by it and forget to run your rental shop. Trust me, it can happen.


![ELDEN RING NIGHTREIGN: Deluxe Edition [FitGirl Repack]](https://i5.imageban.ru/out/2025/05/30/c2e3dcd3fc13fa43f3e4306eeea33a6f.jpg)
 English (US) ·