.png)
The Undertaker remembrance quest in Elden Ring Nightreign is one of the additions brought by The Forsaken Hollows DLC. The remembrance questlines are how the game tells you the stories behind the Nightfarers who fight in the Roundtable Hold. While remembrance quests have a narrative purpose, completing them also rewards you with great items related to the characters whose missions you finished.
If you plan on chasing the answers to the questions surrounding the Undertaker, then you have a long journey ahead of you. However, since we already know the path, we’ve prepared this walkthrough explaining how to complete the Undertaker remembrance quests.
Update (Dec. 8): This article has been updated with information on how to complete the entirety of the Undertaker's remembrance quest.
Undertaker remembrance quest walkthrough
Undertaker is a new playable character in Elden Ring Nightreign and if you would like to unlock a new skin and two of the best relics for it, you better complete the Undertaker remembrance quest. The questline has a series of steps that goes from completing regular expeditions to finding hidden characters.
Here are all the steps you must go through to complete the Undertaker remembrance quest, divided by the chapters you unlock in the Journal.
- Chapter 1: Unlock the Undertaker.
- Chapter 2: Complete a regular expedition and acquire a memory fragment.
- Chapter 3: Travel to the Realm of Remembrance and defeat all Nightfarers.
- Chapter 4: Obtain another memory fragment.
- Chapter 5: In the Realm of Remembrance, find the Scholar.
- Chapter 6: Complete the "Night Aspect" expedition.
- Chapter 7: Drop the Dismembered Finger beside the corpse and interact with them.
For more information on how to complete Chapters 3, 5, and 7, check out the sections below.
How to start Undertaker’s remembrance in Elden Ring Nightreign
 Graphic: Paulo Kawanishi/Polygon | Source images: FromSoftware/Bandai Namco
To unlock the Undertaker’s remembrance questline, you must first have the character unlocked. To unlock Chapter 2 and 3, you'll have to play a few rounds as the Undertaker to collect some memory fragments. If you want to get to Chapter 3 as fast as possible, you'll need to defeat a Nightlord while playing as the Undertaker, but you will unlock it eventually just by playing. Additionally, it doesn't matter which if you win or lose, or which Nightlord you end up defeating. You will know if the boss dropped one because the message “Memory fragment found” will appear after you’re back to the Roundtable Hold.
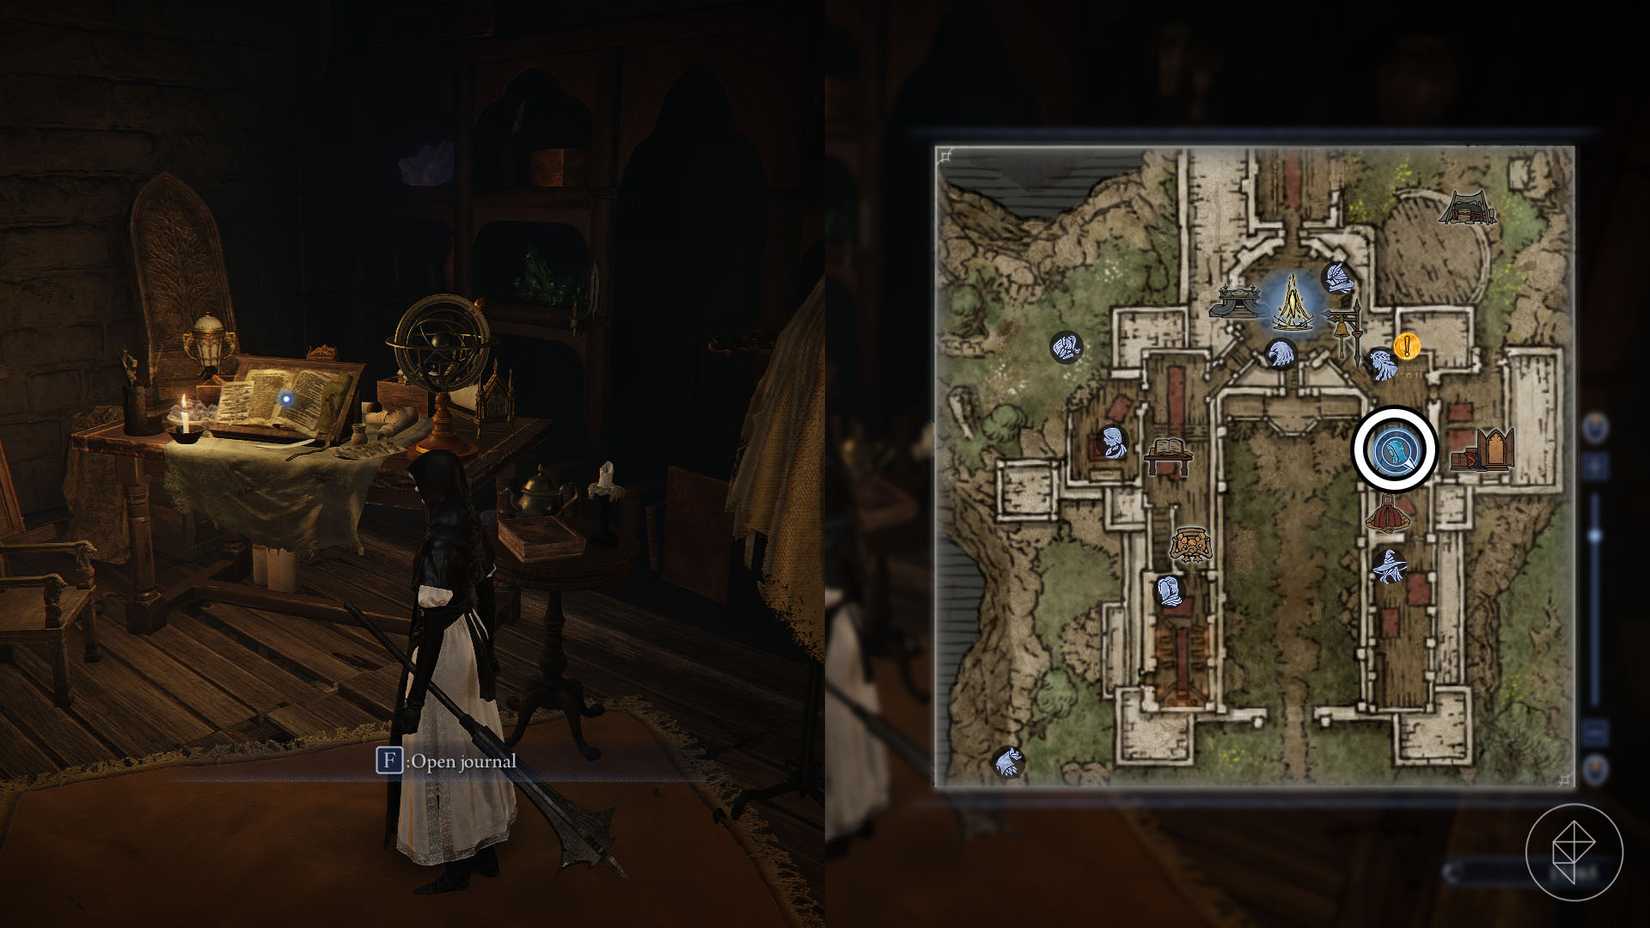
After you receive the first memory fragment, visit the Journal in the first room along the right corridor. Interact with it and open the Undertaker tab. To start the Undertaker remembrance quest, go to Chapter 3 and select "Begin remembrance," which takes you to the Realm of Remembrance.
For the most part of this questline, you must be in this other dimension to complete the remembrance missions and you must be playing as the Undertaker. If you desire to return to the regular Roundtable Hold, use the Journal again and select “postpone remembrance.”
Undertaker Remembrance Quest Chapter 3
After using the Journal to start the chapter 3 mission, you will find yourself in front of Iron Menial. Talk to them a couple of times and, when they say, "As such… You cannot be permitted to live!" they will attack. You can quickly take them down, but once the battle is done, you must prepare for what’s to come.
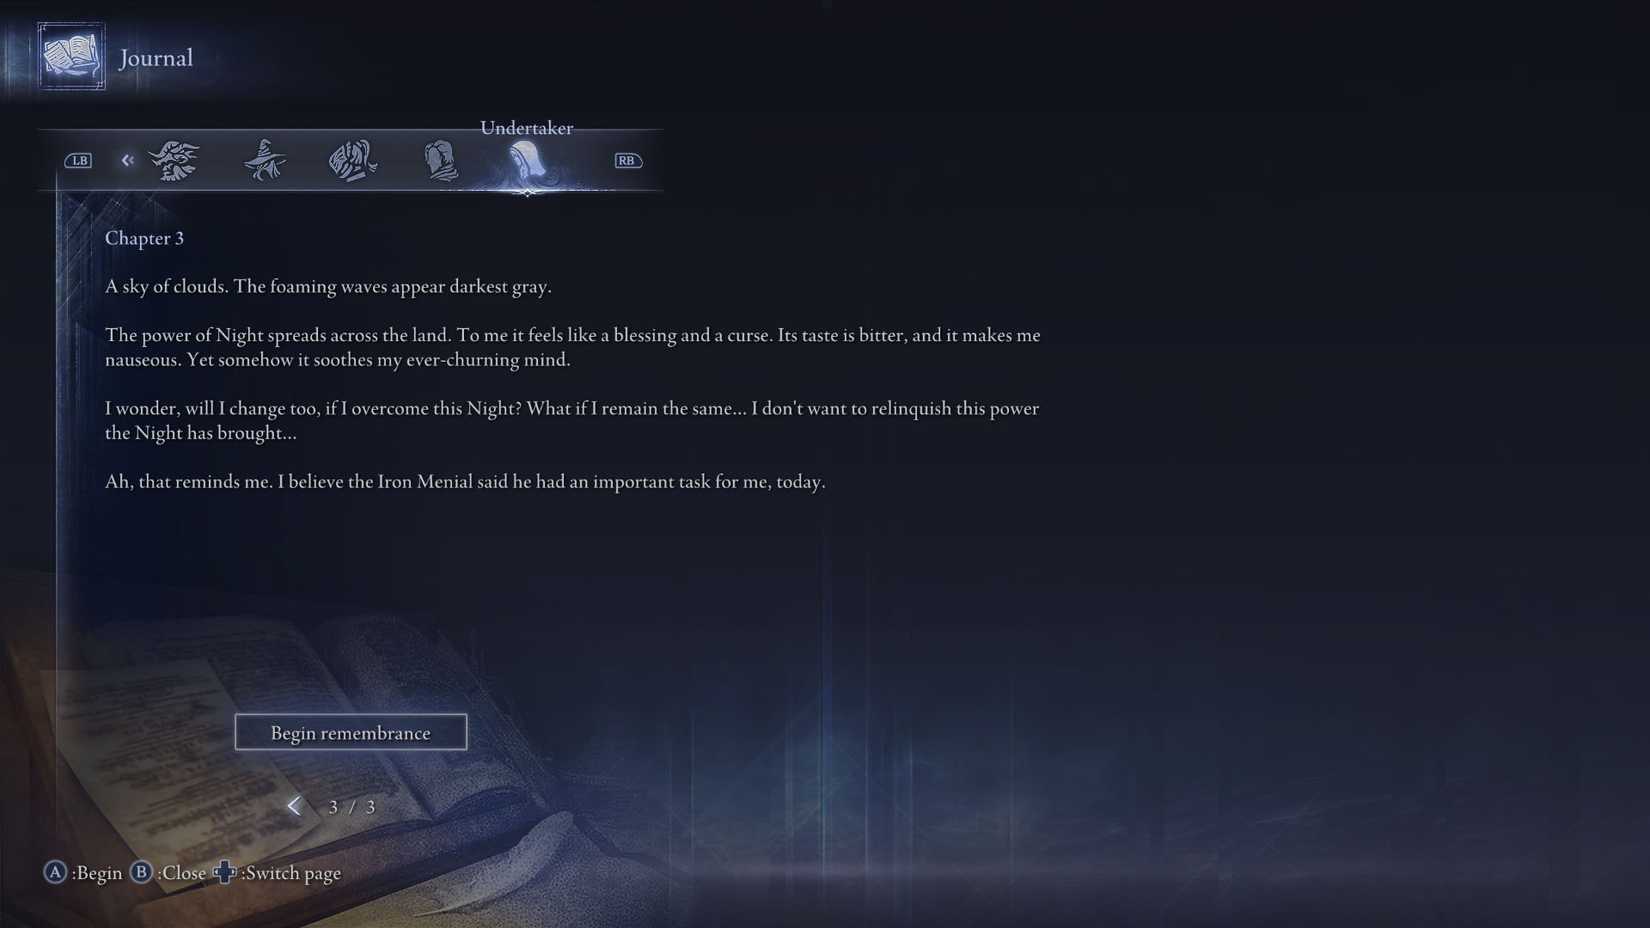 Image: FromSoftware/Bandai Namco via Polygon
The next part of the quest requires you to fight all the other Nightfarers inside the Roundtable. The best general advice is to always use Undertaker’s skill and save the ultimate for situations when you’re facing more than one enemy. You can try this mission as many times as you want, so don’t worry about dying. However, dying will take you back to the beginning of the mission, having to fight every enemy again.
Executor is the first one to appear in the room outside where you fight Iron Menial, but be careful with them, because Executor can parry your attacks. In the main room with the table, you will find Recluse and Guardian waiting for you. Taking Guardian first is the best option, since they get in your way when chasing Recluse.
With those two down, head to the room where the Small Jar Bazaar is located to find Wylder. They can parry your attacks with their shield, so the best strategy is to bait their attacks and hit them with all you’ve got after they finish their animation. After defeating Wylder, you must go to the chapel to face Ironeye and Raider. It’s possible to bait Raider to the previous room, to make it a fair fight — but try to kill them quickly, because Ironeye will eventually follow you.
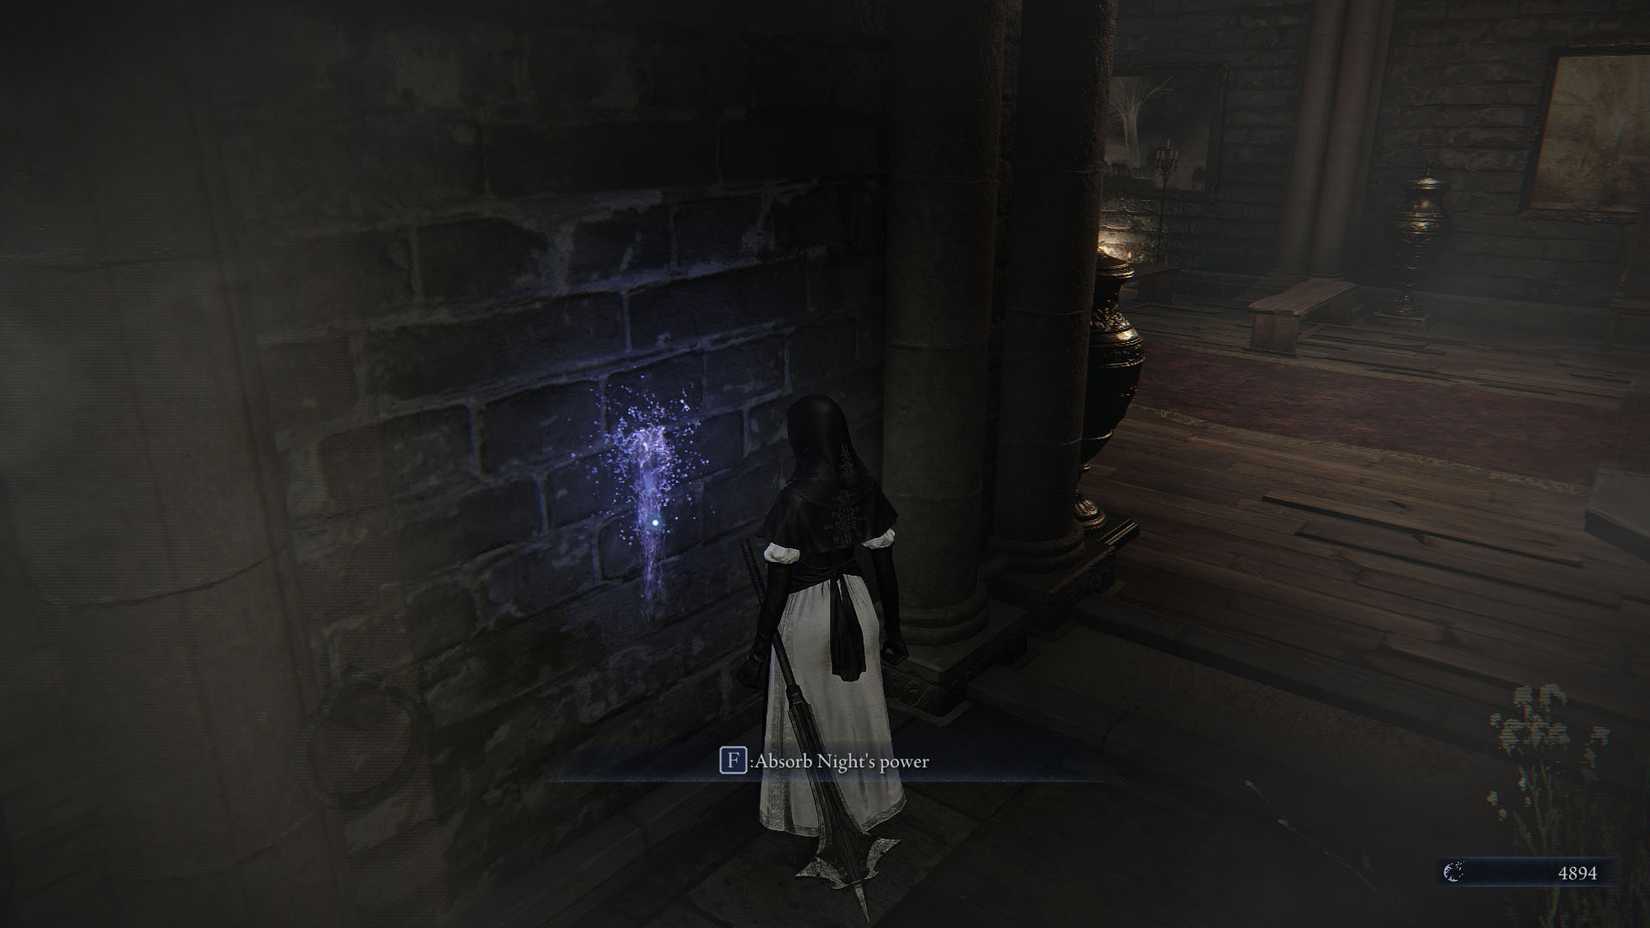 Image: FromSoftware/Bandai Namco via Polygon
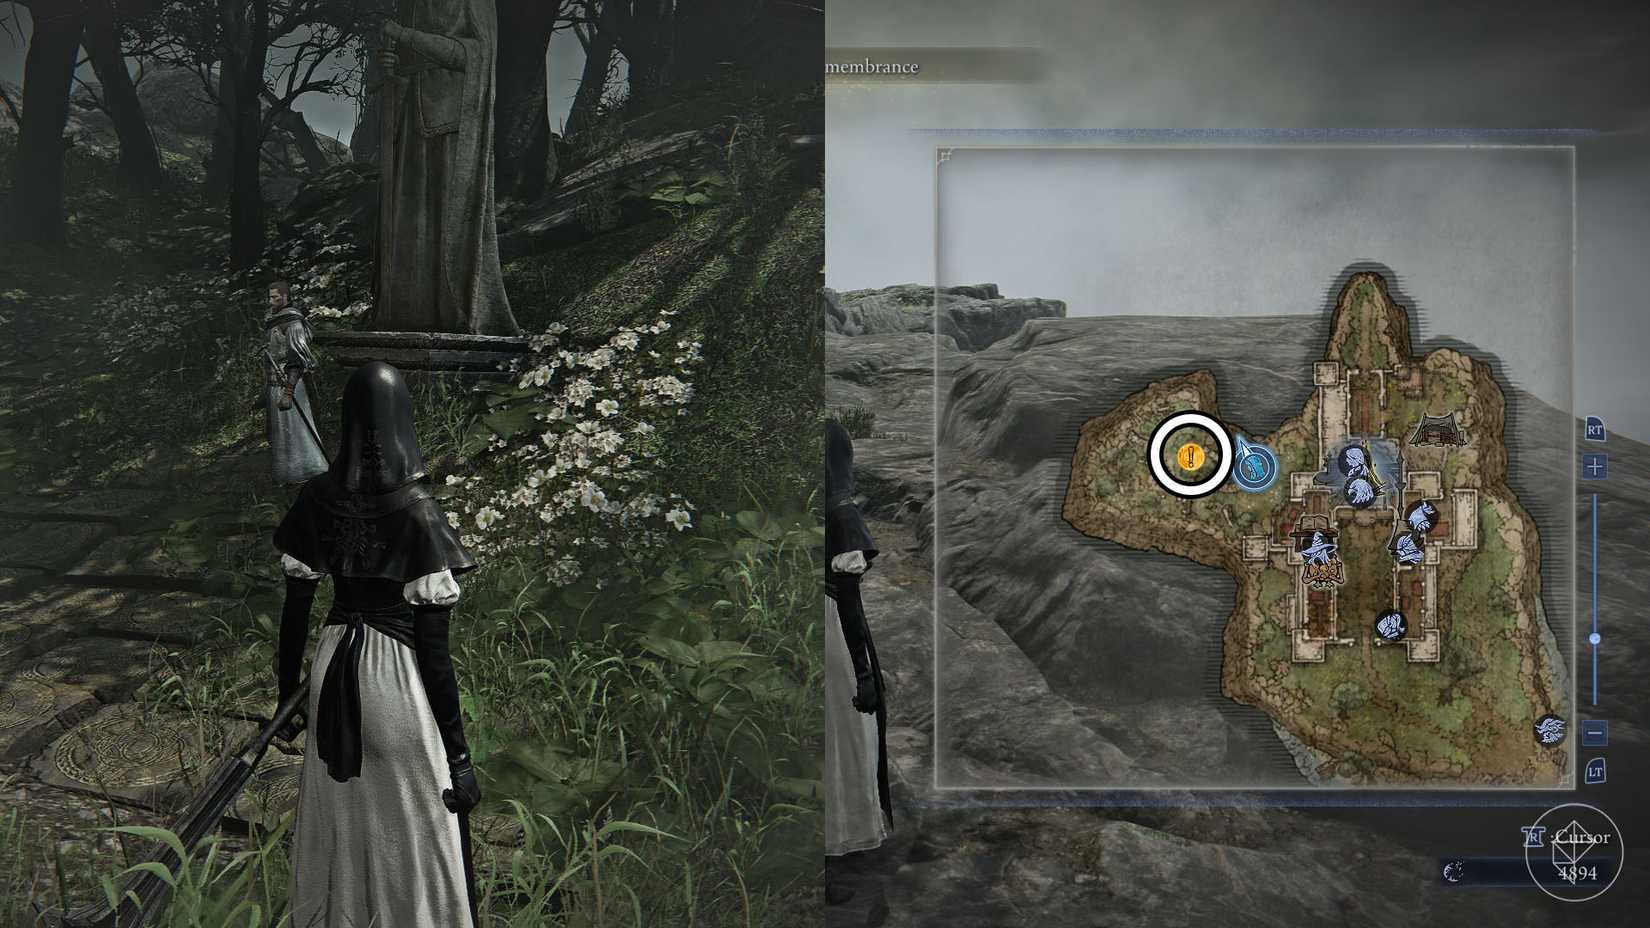
Winning the last battle will prompt a dialogue with Iron Menial where you apologize for your behavior. Next, interact with the blue-glowing portion of the wall near you and “absorb Night’s power.” When you’re done with, uh, feeding from the Night’s power, you must go to the northwest side of the map, outside the Roundtable Hold to find the Scholar. Talk to them to receive the Leather Monocle Case item, then leave the remembrance by using the gateway beside you.
 Graphic: Paulo Kawanishi/Polygon | Source images: FromSoftware/Bandai Namco
The reward for completing this quest is the Leather Monocle Case relic, which is a blue relic and one that is particularly strong for the Undertaker.
Undertaker Remembrance Quest Chapter 5
To unlock Chapter 5 in the Undertaker’s remembrance questline, you must obtain another memory fragment. Once you do, go to the Journal and select “Begin remembrance” again, but now in the latest chapter added.
You will start the mission in front of the roundtable. Talk to the Priestess beside you — a quick conversation that ends with you saying "I shall pray." Head to the chapel (the room where you unlocked the Undertaker) and, when you approach the altar, the "offer prayer" option will appear. After a short scene, talk to Iron Menial, who is in the same room as the Small Jar Bazaar. They will give you a personal objective: search for the Scholar.
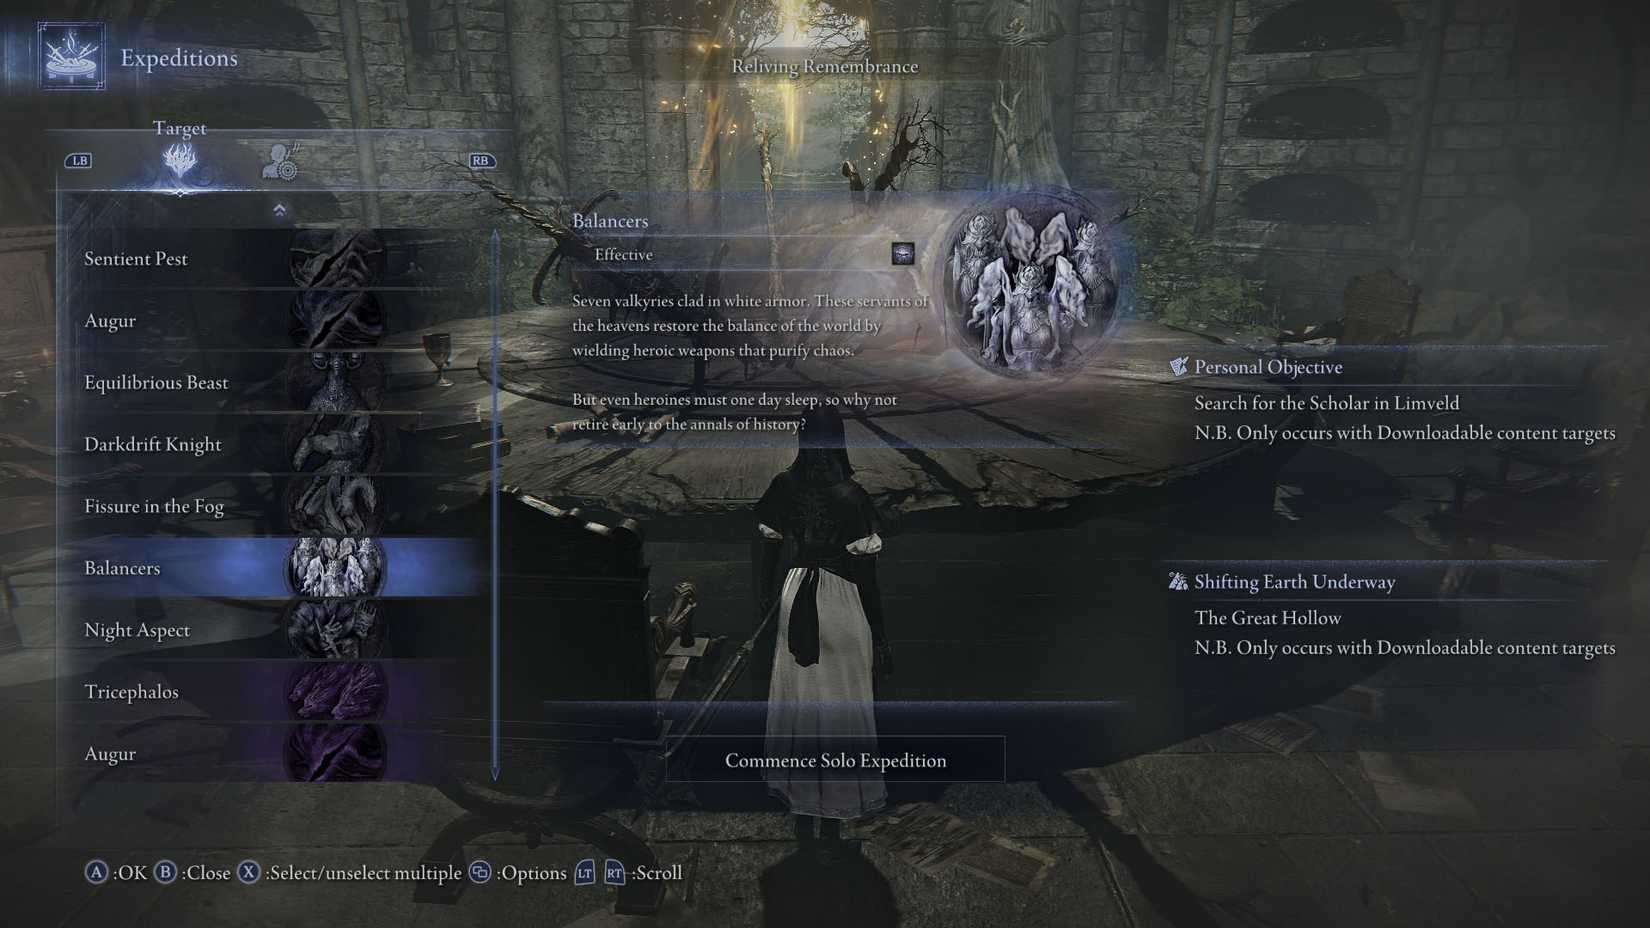 Image: FromSoftware/Bandai Namco via Polygon
To find the Scholar, you must first use the roundtable, while in the Realm of Remembrance, and participate in one of the two expeditions added with The Forsaken Hollows DLC (we chose the “Balancers” expedition). The expedition must also be under the effect of the "Great Hollow" shifting earth event. You can run this expedition solo or in a group, and to complete the personal objective, you don’t need to kill the expedition’s final boss. You can simply wait for the end of the first day and die during combat — it will still count.
 Graphic: Paulo Kawanishi/Polygon | Source images: FromSoftware/Bandai Namco
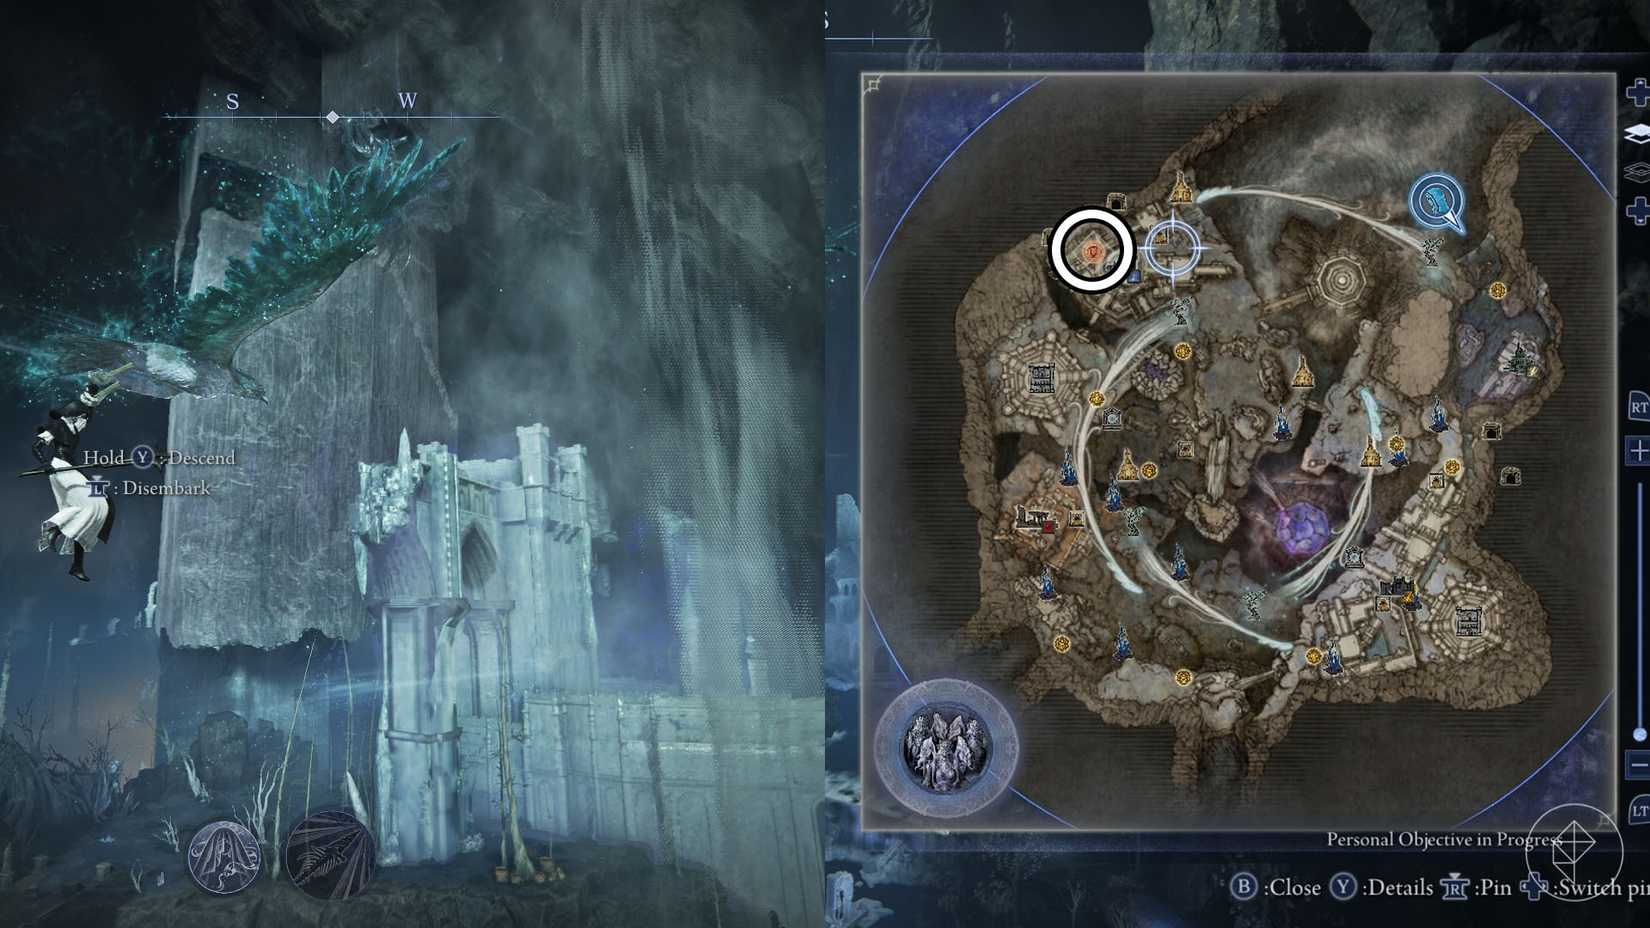
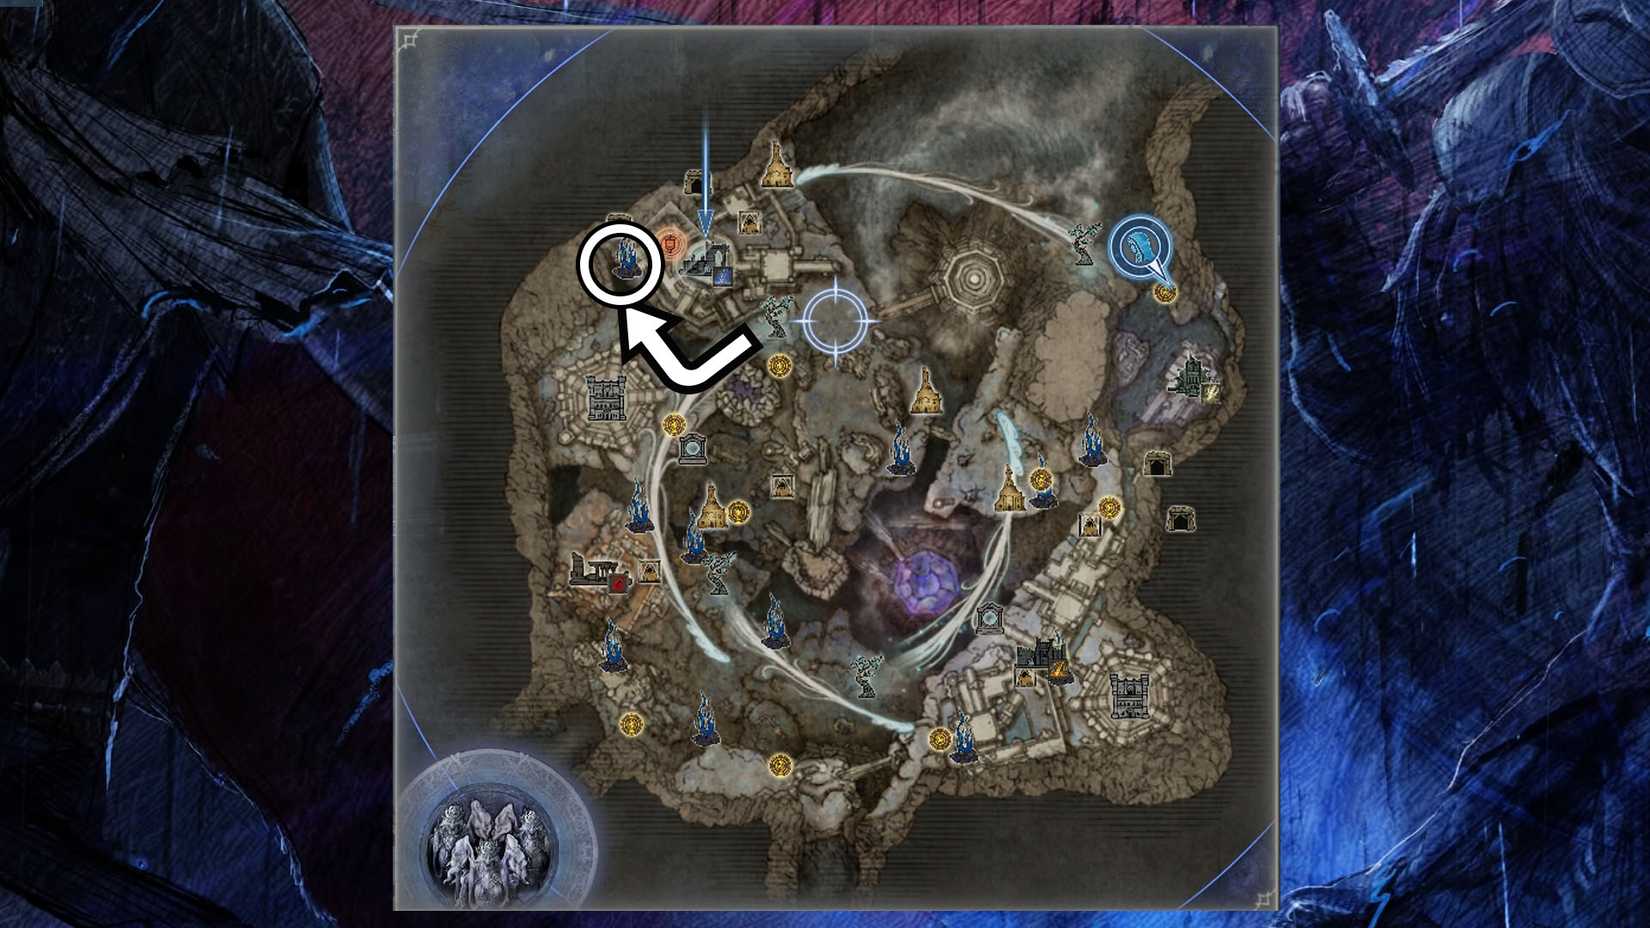
Once the expedition starts, you want to head to the area on the top left side of the map. If you look at the in-game map, you will see a red banner icon marking where you must go to find the Scholar and complete the Undertaker’s personal objective.
 Graphic: Paulo Kawanishi/Polygon | Source images: FromSoftware/Bandai Namco
The Scholar is hidden on the top floor of the castle. To find them, circle around the castle from the outside toward the northwest side, where there is a Spiritstream (blue-flame icon on the map). Use it and land on the open area at the top of the castle. Enter the door on the north and jump from the balcony onto the large rock held by chains in the center.
From the rock, climb over the beams beside it and walk to the opening to the east. It will take you to the room where you will find the Scholar trapped inside a giant crystal. Interact with them to take the "primal core," then talk to the Scholar until they have nothing else to say. By then, you will have completed the Undertaker’s personal objective, and then you can continue playing however you'd like. Just be sure to leave the run without closing the game or returning to the title, or you will lose the quest item and have to repeat the process.
 Graphic: Paulo Kawanishi/Polygon | Source images: FromSoftware/Bandai Namco
When you return to the Roundtable Hold, speak to the Scholar in the chapel. They will give you two items: the Night-Hued Glass, and the Bundled Paper. Getting these items concludes the Undertaker’s second remembrance quest, so you can leave using the remembrance gateway in the same room. Completing this second quest rewards you with the Undertaker’s Chalice, which you can equip in the Relic Rites menu.
Undertaker Remembrance Chapter 7
The last step in the Undertaker’s remembrance questline is simple, but no less challenging than the previous ones. If you check the Journal, you will find only Chapter 6. To unlock Chapter 7, you don’t require a memory fragment like before. All you need is to queue for the "Night Aspect" expedition and complete the run by defeating Heolster, the Nightlord. The fight is a long one, as Heolster has two phases, so be prepared.
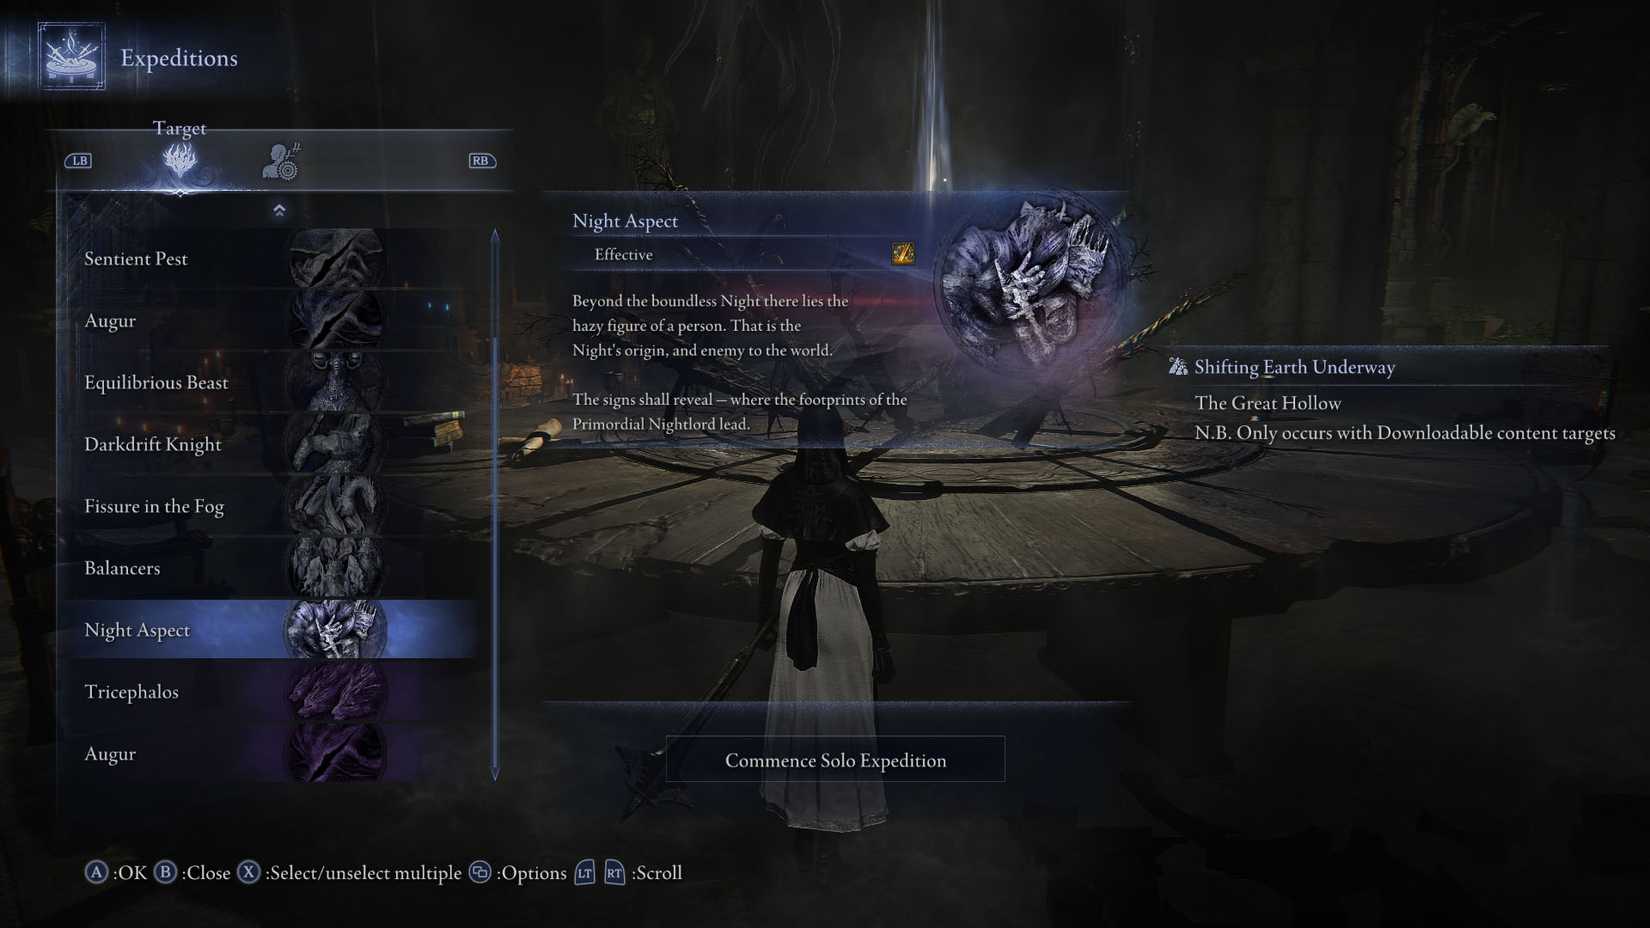 Image: FromSoftware/Bandai Namco via Polygon
You’re transported to a wasted version of the Roundtable Hold after defeating the boss. Before doing anything else, look in your inventory and you will find an item called "Dismembered Finger." Now, enter the building, head forward past the round table, and you’ll see a sitting corpse ahead of you. Do not interact with the corpse yet!
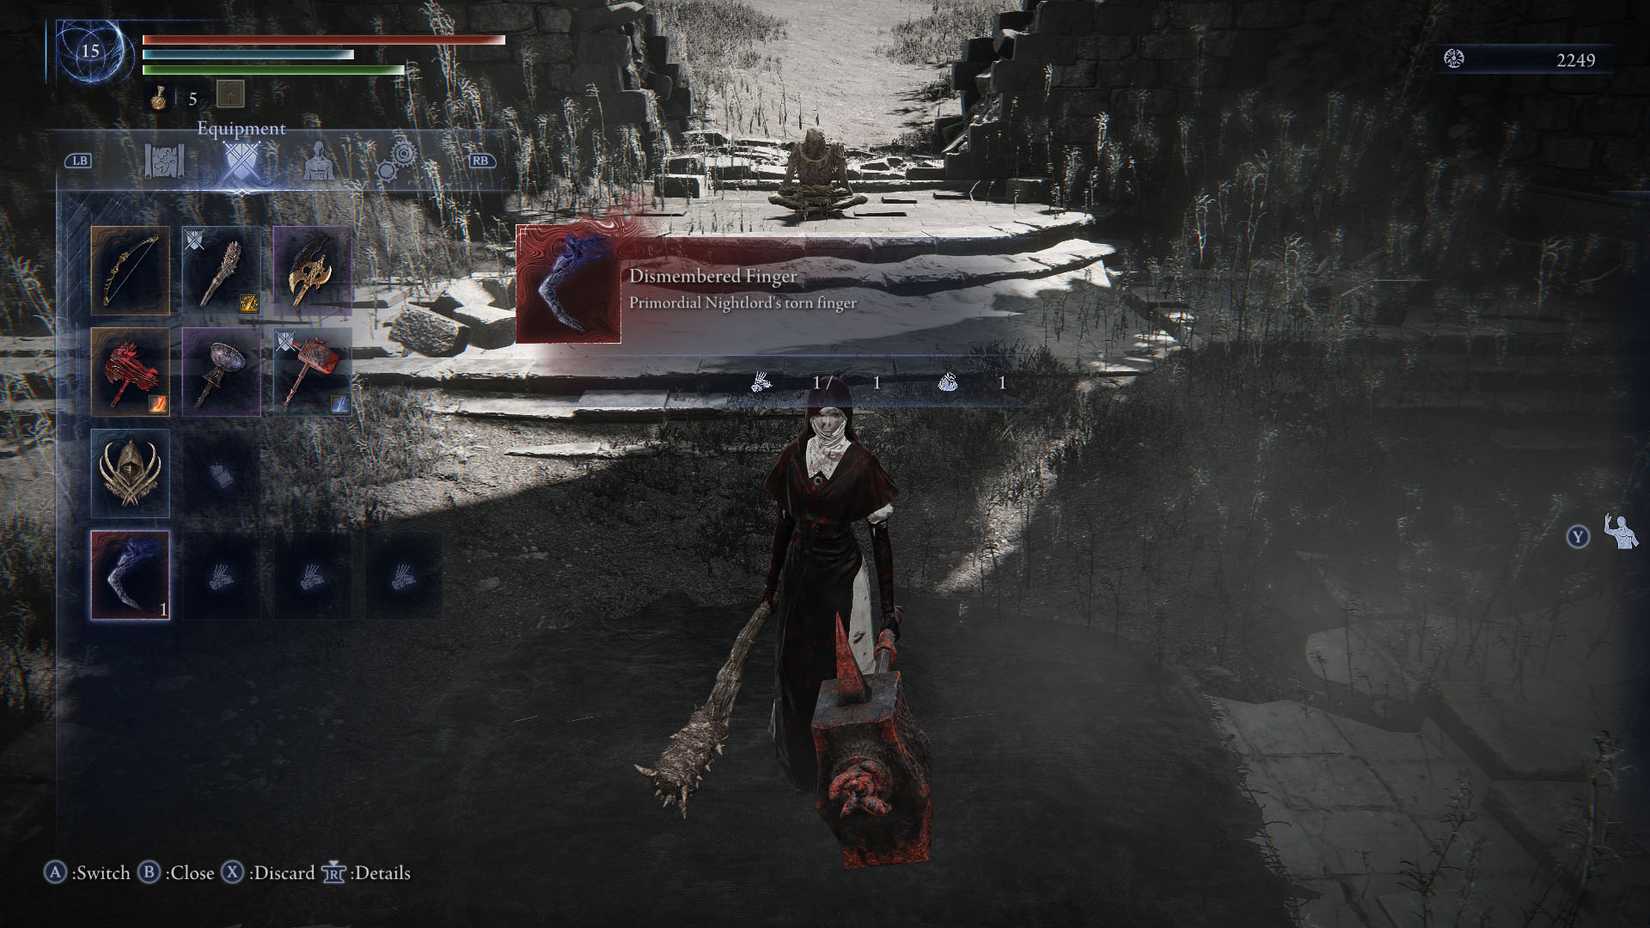 Image: FromSoftware/Bandai Namco via Polygon
To complete the Undertaker’s remembrance quest line, first approach the corpse, open your inventory, and drop the Dismembered Finger. When you do, the Undertaker will utter the phrase "This will do… I’m sure." With the item on the ground, you can interact with the corpse by choosing “Touch corpse,” which triggers a cutscene. This step is crucial. If you interact with the corpse while the finger is in your inventory, you will finish the campaign but not the remembrance quest, forcing you to repeat the expedition to complete this step correctly.
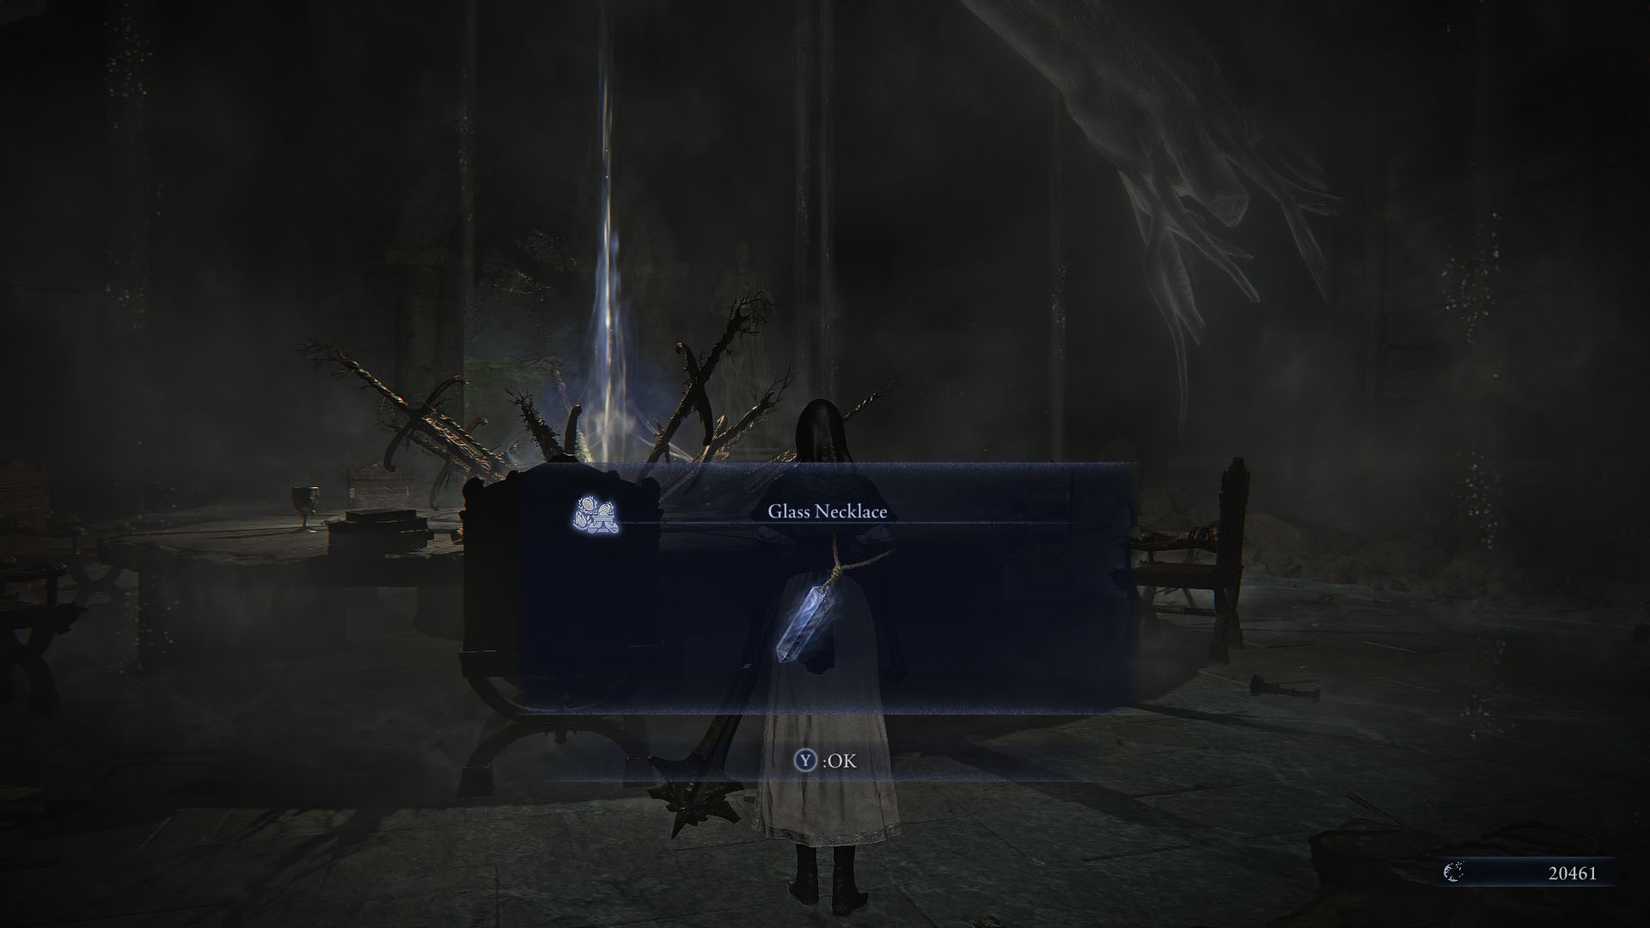 Image: FromSoftware/Bandai Namco via Polygon
When you return to the Roundtable Hold, you’ll see a notification stating the remembrance questline is complete. If you check the Journal, you can now read the Undertaker’s Chapter 7. In addition, you will receive two items: the Undertaker’s remembrance skin and the Glass Necklace relic, which is a green relic and one of the best relics for the class.


![ELDEN RING NIGHTREIGN: Deluxe Edition [FitGirl Repack]](https://i5.imageban.ru/out/2025/05/30/c2e3dcd3fc13fa43f3e4306eeea33a6f.jpg)
 English (US) ·