.png)
.png) 4 months ago
36
4 months ago
36
Dragon Quest VII Reimagined earned its moniker not just because it overhauled classic systems, like removing the limited inventory, but also because it added fresh features to enhance gameplay.
One of these additions is the inclusion of Vicious Monsters. These are high-powered variants of common foes that, when defeated, drop their Hearts: powerful accessories that significantly bolster our Vocation's customization.

Related
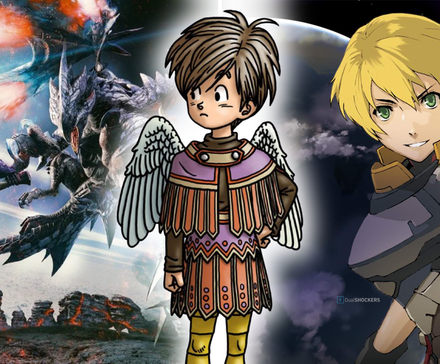
10 Best-Selling Square Enix Games Of All Time
Spoiler alert: there’s a lot of Final Fantasy here.
All Vicious Monsters in Dragon Quest VII Reimagined are found on the overworld. While the early ones are quite straightforward to find, you'll need to thoroughly scout every island to track down the late-game variants.
Along with their locations, I'll share tips on how I took them down. Much of my strategy relied on my current Vocations, which will vary from player to player, but these pointers should lead you in the right direction.
Ballymolloy Region (Past)
Vicious Hammerhood
Reward: Hammerhood Heart (+10% Critical Hit Chance)
After collecting the first Yellow Fragments and teleporting to a new region to find Maeve, you'll emerge on the Ballymolloy overworld. Head south from there to find the Vicious Hammerhood tucked in the corner of the map.
He's waiting to give you the Menacing Monsters tutorial and your first Heart. I suggest taking him on while Maeve is still in your party to make the skirmish a breeze. The only tactic is to defend when it's powered up, unless you want to be one-hit KO.
Emberdale Region (Past)
Vicious Bodkin Archer
Reward: Bodkin Archer Heart (+20% damage inflicted when amped up)
Upon arriving in the Emberdale region, you'll have to loop around to reach the town. The Vicious Bodkin Archer stays on a prominent ledge of the island, pretty much directly in your path.
My only tip is to save Maribel's MP to cast Bang whenever it summons reinforcements and hit the Vicious monster with Dazzle to keep your team safe.
L'Arca Region (Past)
Vicious Meowgician
Reward: Meowgician Heart (Critical spell chance increased by 10%)
In the L'Arca Region, head to the northeast of the island and cross the bridge. You'll find an area swarming with standard Meowgicians and, in one of the corners, this Vicious variant.
Expect him to spam spells. If he lands a critical Sizz, it's going to hurt. I recommend taking out the Mousenaps first, as their basic attacks can cause Sleep, and a sleeping character won't wake up when hit by magic.
Frobisher Region (Past)
Vicious Hammerhood x2
Reward: Brownie Heart (Using "Focus Strength" provides a larger boost to the next attack)
Not exactly creative with the Menacing Monsters yet, eh, Dragon Quest? You'll face two Vicious Hammerhoods this time, located just south of Frobisher village.
Hammerhood A is the aggressor, while Hammerhood B uses Forbearance to soak up damage. You can shut the second one down using Ruff's Aooo! and then focus on the first one.

Related
10 Best Dragon Quest Monster Designs, Ranked
What would Dragon Quest be without monsters like Slimes and Golems?
Roamer Encampment Region (Past)
Vicious Bubble Slime
Reward: Bubble Slime Heart (10% chance of poisoning an enemy when attacking)
As soon as you reach the Roamer Encampment Region, walk slightly south to find this menace nestled between a mountain range.
It's accompanied by two normal Bubble Slimes, and their poison attacks can be a nuisance. The real issue is the Vicious Bubble Slime's high evasion. My strategy was to spam Ruff's Aooo! to paralyze it with fear, ensuring my attacks actually connected.
Al-Balad Region (Past)
Vicious Fandangow
Reward: Fandangow Heart (100% chance of reflecting physical damage taken)
You'll reach Al-Balad by teleporting right in the middle of this desert region. To the northeast, near the river and Temple Palace, you'll find a group of Fandangows led by the Vicious Fandangow.
Most of its attacks are physical, so I cast Dazzle to make it miss most of his swings. Watch out for Fuddle Dance, which can confuse the party. It's a rare stick, but annoying when it lands.
Hardlypool Region (Past)
Vicious Kisser
Reward: Lips Heart (Charm is increased at start of battle / Attack and Magic are reduced)
After exiting the Hardlypool Tunnel, take the west path toward Spilton-on-Sea. To the south of the village, you'll find a Menacing Kisser on the tip of the island.
You'll actually fight three of them, and they are incredibly irritating. They can disgust your party (losing a turn) or Charm them, which is worse than confusion because charmed allies will only attack your own allies and can be hit by your own area-of-effect spells. I used Thief's Victimiser and Jester's One-Liner to brute force the win.
Greenthumb Gardens Region (Optional - Past)
Vicious Mud Mannequin
Reward: Mud Mannequin Heart (MP Absorption +10%)
This region is split into two narrative halves. You won't find this monster on your first visit. You must finish the plot in the past, visit the present, and then return to the past.
On the second visit, check the northeast of the island to find it. This guy constantly drains your MP to fuel a massive spell. Kill it quickly before it can unleash the built-up energy.
The Vogograd region is accessed by finding every Grey Fragment for the third altar.
Vogograd Region (Optional - Past)
Vicious Cyclops
Reward: Cyclops Heart (Critical hits are 30% more powerful)
Teleport to Vogograd and take the east path to find the cyclops.
The Vicious Cyclops is a heavy hitter but a one-trick pony, since it only uses physical attacks. Keep Dazzle active at all times. If it lands a critical hit, it's a guaranteed one-hit KO. I used Kabuff for defense and Blunt to weaken his power. It went down without me ever needing to heal.
Aeolus Vale Region (Past)
Vicious Scrapper
Reward: Scrapper Heart (One attribute is randomized every turn)
Hug the western mountain, follow the path to the end, and whack the scrapper on its head.
The Vicious Scrapper attacks three times per turn, but despite this, it isn't too difficult. Treat it like a standard boss, and it will be scrap metal in no time.
Related
10 JRPGs That Take Forever To Complete
I really want to emphasize the “forever” in the title.
Buccanham Region (Past)
Vicious Green Dragon
Reward: Green Dragon Heart (Damage received is halved when at full HP)
As soon as you place your lovely feet in the Buccanham Region, turn around and go south to find this Vicious draggy. It will be accompanied by two Mandrake Mercenaries.
The dragon's skillset is the same as any other green dragon; it will bite and slam its tail at you, potentially making one of your characters tumble and lose a turn.
The Mandrake can cast Oomph on the beast, so you either kill them first or cast The Great Leveller on the dragon. If you can protect against breath attacks, do so. If not, just dish out damage normally, and it will fall.
If you have followed this guide to the letter and defeated every Vicious Monster that appeared in front of you, you will earn the Vanquisher of the Vicious trophy with this victory.
The remaining Vicious Monsters will appear after a while, when normal monsters start to roam the present-day world. They can be tackled in a non-linear fashion.
Aeolus Vale Region (Present)
Vicious Dragster
Reward: Dragster Heart (Ensures that the user gets the first turn)
As soon as you leave Aeolus Vale, make a west turn and go north to find this Vicious monster at the end of the path and be prepared to face this annoying creature.
Overall, it's just a run-of-the-mill Vicious foe. It'll attack twice per round, sometimes body bashing you and other times spewing fire. The problem is when his soul lights up.
Will this Vicious Dragster spew fire twice, dealing between 160–200 damage per turn? Yeah, but okay, you have faced tougher enemies. The major issue here is that this coward will run. You read that right! Run!
It means you'll have to face it once again until you win. So prepare the biggest damage-dealing skills you have in your arsenal and cripple this bastard before it can sprint away.
Vogograd Region (Present)
Vicious Vis Mager
Reward: Vis Mager Heart (MP consumption for skills is doubled / Increases magical might by 50%)
This mage is found on the east side of the Vogograd Region.
Being a sorcerer, it will unleash a few AoE spells, so prepare accordingly. It's also accompanied by some minions, and if one of them dies, it will most likely cast Kazing. If you have powerful AoE skills of your own, spam them to kill its henchmen and make it lose a turn by rezzing enemies.
I can't say much more because I defeated it with a combo of the Champion's Divide perk and a gatling gun of Multifists. But if I managed to defeat it, you will too. Its Heart is one of the best in the game, even better when paired with the Mad Cap.
Buccanham Region (Present)
Vicious Well Wisher
Reward: Well Wisher Heart (Damage taken reduced by 50% when HP is at 25% or lower)
The Vicious Well Wisher is located in the southeast spot in the Buccanham Region.
Upon entering the battle, I suggest killing the Octopaths posthaste because they can cast Death Dance, which may kill a party member on the spot (or force you to spend a Diamond).
After that, just focus on the Well Wisher. It won't be hard, especially if you have already unlocked and mastered a few Advanced Vocations.
Unnamed Isle (Present)
Vicious Admirer
Reward: Admirer Heart (Enemies are afflicted with status ailments more easily)
The Unnamed Isle is found south of Estard Isle. You unlock it by completing the optional Substory in the Regenstein Region by accessing the first grey pedestal.
When the Vicious Admirer's fire has been lit, he will summon Rockbombs. Do you know what that means? Yeah, potentially party-wiping Kamikazees. Deal with those stupid bombs ASAP or just focus your efforts on killing the Vicious one, because the battle ends once it is dead.
Hardlypool Region (Present)
Vicious Gold Golem
Reward: Gold Bracer
This shadowy Golem can be found beside King Maximo's Mansion. The monster will be accompanied by a Frighturn and a Mimic.
You should prioritize destroying the Mimic first unless you don't want to suffer through Thwack spam. The Frighturn can cause confusion, which the Gold Golem will most readily cure with a critical hit to your forehead. Other than those moves, there's not much to pay attention to, including the underwhelming victory reward.
Wilted Heart Region (Present)
Vicious Silver Sabrecat
Reward: Great Sabrecat Heart (Increases the power of physical attacks by 30% when at full HP)
The Wilted Heart is unlocked after completing the corresponding Substory, localized in the Greenthumb Gardens region. This shadowy sabrecat is found south of the region's ruins.
The monster will be accompanied by a crew, so you should deal with all of them before tackling the boss. AoE skills will do wonders for this battle. I literally won it immediately by using Duplicate and then casting a Big Banga.
Roamer Encampment Region (Present)
Vicious Cureslime
Reward: Cureslime Heart (Increases the effectiveness of healing spells by 50%)
Before going to the Altar to chit chat with the Almighty, stop in the middle of the road in the Roamer region to face this Vicious Cureslime.
As you may have assumed, the Cureslime will summon minions to help it. It summoned four Lethal Armours and constantly called for more once one was dead, so the obvious suggestion is to focus on the Cureslime and make short work of it.
Next
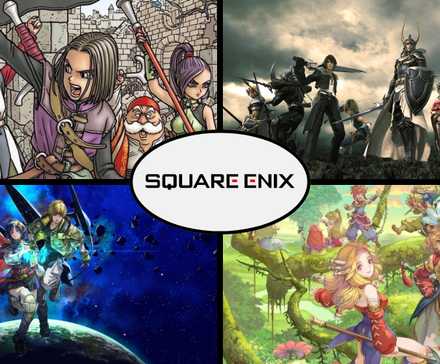
10 Best Square Enix Franchises, Ranked
Square Enix is one of the most prolific Japanese developers, but not all its franchises get the love they deserve.

Released February 5, 2026
ESRB Everyone 10+ / Comic Mischief, Fantasy Violence, Mild Blood, Mild Language, Mild Suggestive Themes, Use of Alcohol
Publisher(s) Square Enix


![ELDEN RING NIGHTREIGN: Deluxe Edition [FitGirl Repack]](https://i5.imageban.ru/out/2025/05/30/c2e3dcd3fc13fa43f3e4306eeea33a6f.jpg)

 English (US) ·