.png)
.png) 7 months ago
161
7 months ago
161
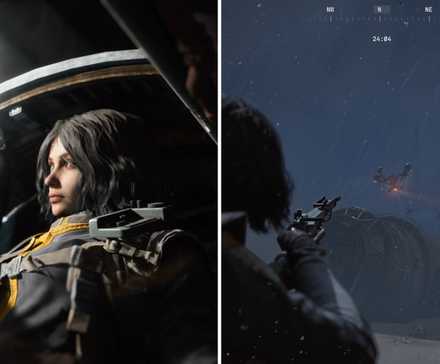
ARC Raiders is a game that doesn't seem to slow down in terms of updates and content. This extraction shooter is bringing all sorts of new things to the game, from the Cold Snap update to the new secret mystery doors on Buried City.
Unlike most puzzle, this particular musical one comes with a lot of baggage. You'll more than likely fail at least a few times unless every raider on the map decides they want to play nice.

Related
ARC Raiders: Full Trophy And Achievement Guide
Here's how to unlock every trophy/achievement in ARC Raiders and crown yourself the best raider in Speranza.
What's really special about this secret room is that the community really came together to solve this difficult puzzle. This post on Reddit provided me with the information I needed to do this myself, but you can find a nice, easy outline below with some helpful tips and tricks.
What is the Music Door Puzzle?

In the Cold Snap update, it seems the devs added in some other new things under the radar. If you've been eagle-eyed in your time topside, you may have noticed a few buttons scattered around the Buried City map.
These all connect to a very specific door located on the map, which, when opened, gives you one of the rarest items in the game. You can't get the items you find here any other way, as far as I'm aware.
It's incredibly difficult, but I promise it is totally possible. You'll struggle, but once you manage to do it, there's not much else like it. You'll find the solution, in order, in the next section.
Related
8 Reasons You’re Dying Too Frequently in ARC Raiders (And How to Stop It)
These are common mistakes that lead to players dying too frequently in ARC Raiders.
How to Solve the Music Door Puzzle?
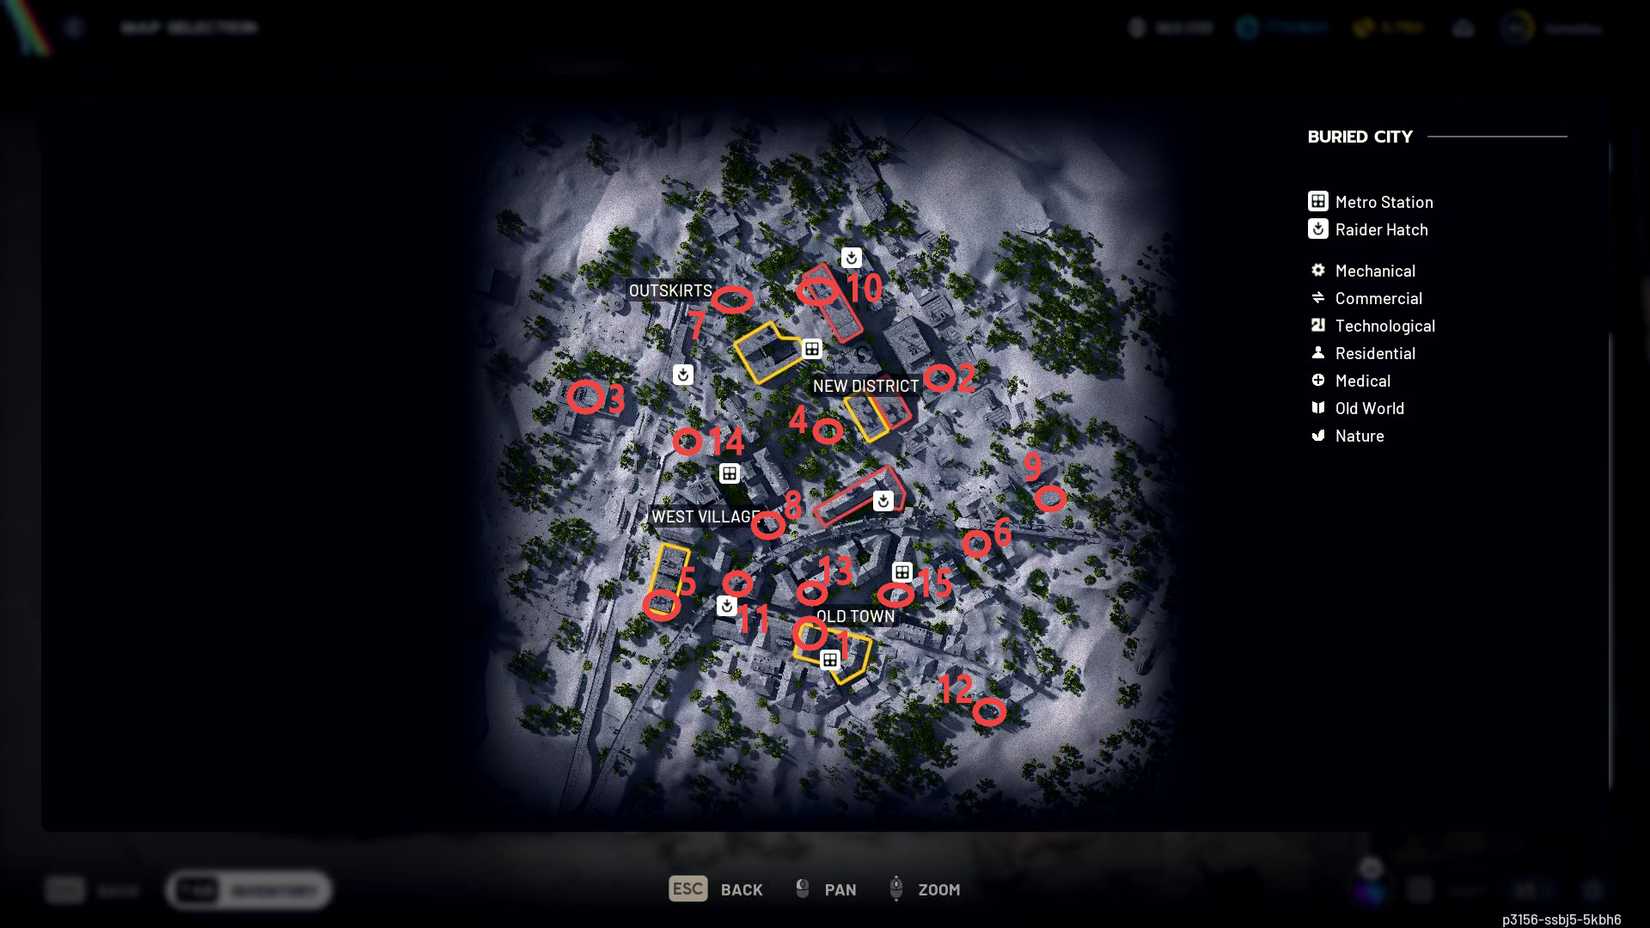
To solve this frustrating puzzle, you'll need to push 15 buttons all across the Buried City map. They'll need to be pressed in a very specific order, which can be seen by the various musical notes near all the buttons.
It's best to do this in a three-stack if possible, but you can manage with two. One thing to keep in mind is what you're planning on bringing on this little quest. You'll at the very least want to bring a basic loadout, as a lot can, and usually does, go wrong.
How you'd like to tackle it is entirely up to your group, but I'll leave some notes on how my team ended up doing it. Try to make a strategy beforehand, as that'll make things a little bit easier. This guide will focus on using a three person team.
You cannot do this solo, even with a Snaphook. It takes too much time to move from spot to spot without help.
First Button — Plaza Rose
The first button will be located in the yellow house in Plaza Rose on the top floor of the right side if you're facing the building from the extraction point. Go through the left side entrance and then head up the stairs and back to the right by the chairs. You'll see the button right between the wall and some chairs.
Once you've pushed this button, it's game on, and there can't be any screw-ups. If a button doesn't light up when pressed, it means you're starting back from square one, so be very careful. Once this Player A presses this button, they should make their way to the sixth button.
Second Button — Gallery
If you go to the south side of the roof of Gallery, you'll find a zipline that leads into a building. If you immediately turn left and head around the side of the wall, you'll come across the other button between some shelves.
If you're running with a trio, this is probably where the strongest player, game-wise, should go. They'll be pushing the most dangerous buttons for the most part. After this button push, Player B should head for the fourth button.
You'll want to stagger yourselves as a group. If someone is waiting at a button, it's better than running out of time.
Third Button — Warehouse
On the roof of Warehouse by where the broken windows are, you should see a couple of machines up against the wall. In between them is the third button.
This button sequence usually ends up the easiest and safest, although the worry of other players is still there. This player will end up taking most of the buttons on the fringe of the map. Although this player, Player C, will be off to the fifth button, where you can sometimes find other players.
Fourth Button — Marano Park
The most dangerous button to push is probably this one, as it's located next to one of the more powerful ARC spawns. You'll find it in a small newspaper stand in the center of the park.
When you enter the door, the button is immediately on your right. This can be a good spot to hide from the Bastion or Bombadier, but getting out may prove difficult. If you run quickly through the trees into Research, you can usually avoid too much damage. If Player B is feeling really confident, head straight to Library so you can hit the seventh button afterward.
Fifth Button — Grandioso Apartments
This one is on the very top floor of the smaller building. When you take the zipline, make your way to the windows and break them to get outside. Head to the room on the back side, and you should find the button on the floor behind the bed.
From here, Player C can make their way to the eighth button to set up for the next sequence. This is where things start to get dicey, and you need to make sure every single button lights up. If it doesn't, you should just loot and head on home.
On the other side of the floor in the building across the small metal bridge, you can find a zipline that'll get you much closer to the eighth button.
Sixth Button — Piazza Arbusto
This one is only dangerous because it's a bit annoying, and outside. On top of the pharmacy building, there's a small tower, and on the front ledge of this tower is the button. Walk carefully around the side ledge and press the button.
Next on the agenda for Player A is button number nine. You can use the highway right behind the pharmacy building to make the trip a little bit easier.
Seventh Button — Su Durante Warehouses
This button is luckily one of the easier ones to get at and is located inside a bus on the road outside the warehouses. It's nestled between two chairs and provides a nice place to relax for a moment.
The next button for Player B is the tenth. It's a bit easier to get to, thankfully, but you'll probably want to avoid any extracting teams in the area. Hitting this one means you're halfway done.

Related
Eighth Button — Corso da Vinci
If you took the two ziplines from the fifth button, you can head over the metal bridge and into the building; if not, just make your way into the building and take the zipline to the top floor. Head into the only open room and turn left around the corner. This one is also on the ground behind the bed.
Button number 11 is what's up next for Player C, and thankfully, it's pretty close by. This is when things should start rapidly speeding up in the process as you near the finish line.
Ninth Button — Buried Properties
In the broken-down building closest to the highway next to the Field Depot that spawns there, usually you'll find this button on the metal platform between the broken-down wall and the yellow transformer. There are a few other containers around, so if you're waiting, you might want to loot some.
Next, Player A should head towards the twelfth button in Church Ruins. You can pretty safely reach the next one by just sticking to the edge of the map.
Tenth Button — Hospital
So close and yet so far, this button is located under the stairwell on the bottom floor of Hospital by the metro entrance. Head into the stairwell and look underneath; there should be a large metal box, and between this box and the actual stairs, you should see the button.
From here, Player B can head towards Piazza Roma for the fourteenth button. This is a great time to do some looting while you're on your way to the next one.
Eleventh Button — Abandoned Highway
Coming from the eighth button, you should come across a zipline that leads up to wear the highway meets the roof of a house. Take the zipline and face the rubble, go to the right, and under some of the rubble, you should see the button.
Only one button left for Player C, and that's the thirteenth button. By now, your time is probably running out, so you may want to make a fast break for it.
You can just jump on the highway and take it towards the next one. It should drop you off close to the next button.
Twelfth Button — Church Ruins
This button is in the middle of nowhere and just sitting out in the open for the most part. There should be a section of the roof that seems almost buried by sand. On that should be a small pillar, and up against that is the button.
From there, Player A can make their way to the final button. Worst case scenario, they can manage to go tag the thirteenth if needed, otherwise they can just hang out at the final destination.
Thirteenth Button — Santa Marie Houses
No matter what floor you enter these houses on, you'll want to make your way into the attic. Next to the brown dresser on one of the walls, you should see the button. Give it a press and make sure it lights up.
Now that should be all the buttons for Player C, and all that's really left is to get to the final button. This player can also make their way to the fourteenth button if necessary.
Fourteenth Button — Piazza Roma
Just outside Piazza Roma, towards Warehouse, there's a tower that you can climb into. Inside, you'll find the last real button necessary to get everything done.
At this point, there's no way for anyone to screw anything up. Make your way to the final button, but be aware of how much time is left. My group ended up finishing with around seven minutes left.
Final Button — Red Tower
The final button is outside the door that unlocks when you've pushed every single button. All the lights should be on by this point, and hopefully, your whole team has managed to make it this far.
It's been a long journey, and your hard-fought reward is just on the other side of the door. Just open it and claim what's rightfully yours.
Music Door Puzzle Rewards

Inside this incredibly difficult puzzle room is just a bunch of musical instruments. While it may be a bit disappointing to some who were hoping to get some rather incredible loot, you will get the following:
- Guitars
- Flutes
- Shakers
Guitars are technically one of the rarest items in the game. The only way to obtain them is through completing this challenge. But really, the best reward is the feeling of accomplishment that you did something so difficult in this extraction shooter.
There's likely to be even more secrets revealed in the coming updates. Just be careful while roaming topside, since this isn't a co-op game, it's unlikely you'll run into people as cool as my team, and I did.

Next
ARC Raiders: Where To Use the Spaceport Container Storage Key
This guide explains where to use the Spaceport Container Storage key in ARC Raiders.

Released October 30, 2025
ESRB Teen / Violence, Blood
Developer(s) Embark Studios
Publisher(s) Embark Studios


![ELDEN RING NIGHTREIGN: Deluxe Edition [FitGirl Repack]](https://i5.imageban.ru/out/2025/05/30/c2e3dcd3fc13fa43f3e4306eeea33a6f.jpg)
 English (US) ·